TryHackMe – Extending Your Network – Complete Walkthrough
The ‘Extending Your Network’ room on TryHackMe gives a good overview
This room can be found at: https://tryhackme.com/room
Walkthrough
Task 1 – Introduction to Port Forwarding
Port forwarding, also called port mapping, is a function of Network Address Translation (NAT). Basically, the destination IP address and port is mapped to a different IP address and port on the network itself.
In other words, the IP address and port seen by someone outside the network is different from the IP address and port as seen by someone inside the network.
Although this is used most often to mask the IP and port information and provide a layer of security, port forwarding is configured at the router rather than the firewall.
Question 1
What is the name of the device that is used to configure port forwarding?
Walkthrough:
Whenever we think about data being exchanged into and out of a network, we should be thinking about routers.
Routers are the devices that are in charge of this data exchange and allow networks to communicate with each other, creating a larger network composed of smaller ones (i.e. the internet).
Answer:
(Highlight below to find the answer):
router
Task 2 – Firewalls 101
You’ve probably heard of firewalls even if you’re new to infosec.
A firewall is like a border for your network. Think about the concept of a border. If your country has no border, people could just travel in or out of the country without checking in or out with anyone. But if your country does have a border, people only have certain areas where they are allowed to cross. Modern borders may be physical but often use other technologies (like cameras or motion detectors) so that a physical wall doesn’t need to be built along the whole border itself.
A firewall is like having a full, physical border wall between your network and the internet. Firewalls allow the traffic that you want while preventing all other communication.
They are one of the most important and commonly used security measures in any network.
Question 1
What layers of the OSI model do firewalls operate at?
Walkthrough:
Firewalls can be used to regulate traffic using both IP (the Network layer) and TCP/UDP (the Transport layer). They can accept/deny traffic based on network, IP address, protocol, and other characteristics.
Answer:
(Highlight below to find the answer):
Layer 3,Layer 4
Question 2
What category of firewall inspects the entire connection?
Walkthrough:
There are different ways of categorizing firewalls. One is by grouping into stateless and stateful.
Stateful firewalls determine whether or not to block a device based on the entire connection. This consumes a lot of resources but also makes them adaptive and smart. For example, they may allow part of a connection but may cut off all further communication from a given host.
Stateless firewalls have a static set of rules that they follow. They analyze each packet specifically to determine if it should be allowed through or not. While this means that they are not as adaptive (i.e. ‘dumber’), they also consume a lot less resources than their stateful counterparts.
Answer:
(Highlight below to find the answer):
Stateful
Question 3
What category of firewall inspects individual packets?
Walkthrough:
This category does not analyze the entire connection.
Answer:
(Highlight below to find the answer):
Stateless
Task 3 – Practical – Firewall
This Task contains a simulation in which we must use a firewall to prevent out network from crashing. This is an example of a Denial of Service (DoS) attack, which is used to overload a computer with data, causing it to crash (similar to the way opening up too many apps can cause your device to overload) or become unavailable to users.
Open the simulation by clicking the green “View Site” button at the top of the Task.
We are greeted with some instructions for the exercise. The countdown starts as soon as you click the blue “Start Simulation” button. Don’t be surprised if this exercise takes a couple of tries.
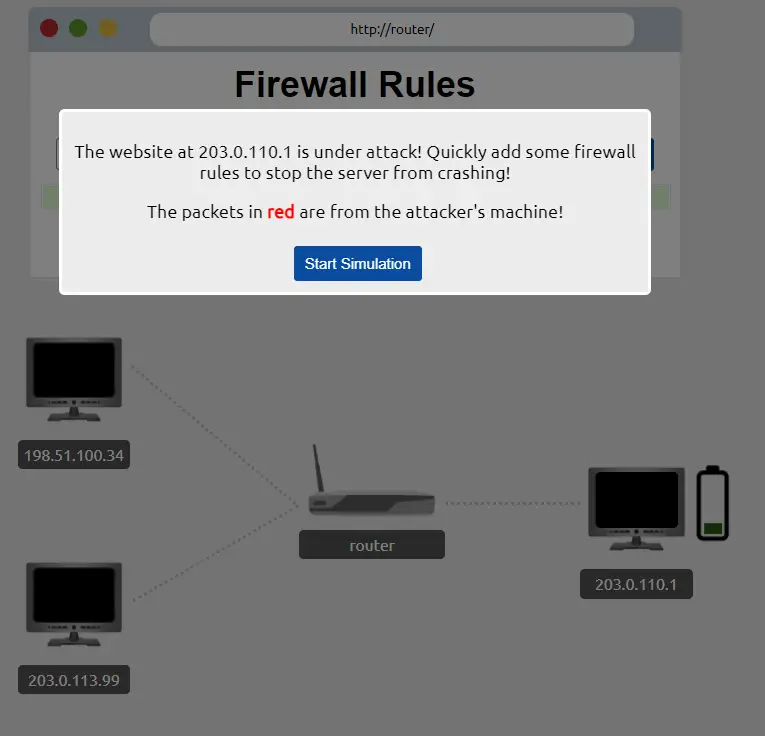
The instructions give us a clue of what to expect before we start the simulation. We are told that the website we need to defend has an IP address of 203.0.110.1 and that we will need to configure a firewall before the server crashes. Red packets represent packets from the attacker, while green packets are regular traffic.
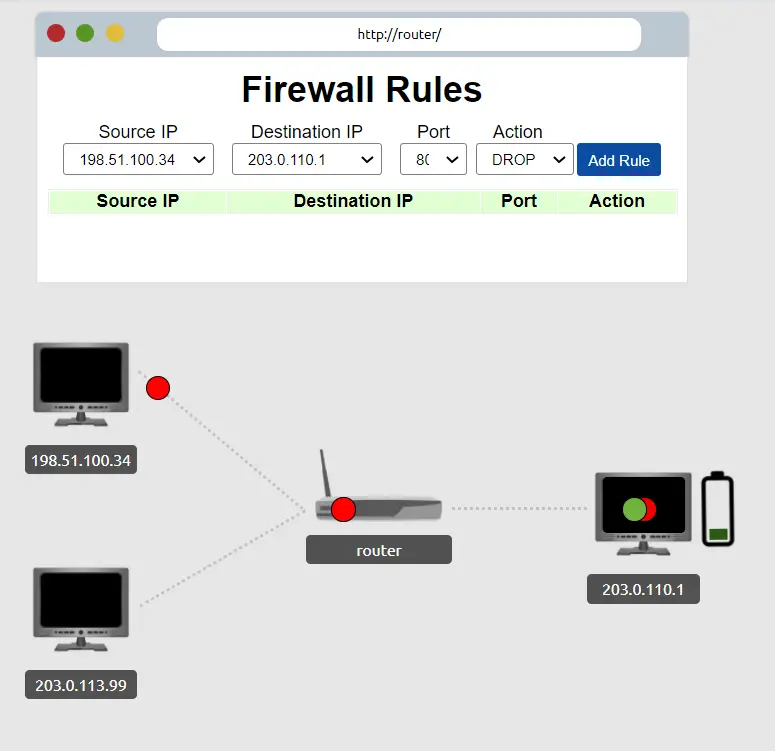
After starting the simulation, we will see two computers on the left that are both trying to access our server (on the right) via a router (in the middle).
There are lots of packets streaming from the attacker, who has an IP address of 198.51.100.34 (this is shown below our attacker’s computer icon).
As the packets make it through the router to our server, the server begins to overload. This is represented by the battery icon next to our server:
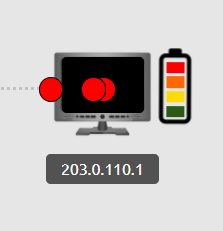
How can we prevent the server from crashing?
We need to quickly configure the firewall to block traffic from the attacker while allowing traffic from friendly sources.
We have the Source IP (the attacker’s IP address) and the Destination IP (our website’s IP address).
At the top of the page you’ll see a section called ‘Firewall Rules‘. In the drop-down box underneath Source IP, select the attacker’s IP address.
Next, we’ll need to configure the Destination IP. This is the IP address of our server. Select this under the Destination IP drop-down box.
After this, we’ll need to select a port to be blocked by keeping the Action category set to ‘drop’. This will ensure that any packets with that destination port will dropped by the firewall.
We can either add a rule for each port available (there are five) or we can try to target the specific port that is being attacked.
The most common way to solve this is simply to shut down all traffic from the attacker by creating five rules, one for each port.
If you experiment with the simulation, however, you will find that all of the packets coming from the attacker are targeting port 80. Port 80 is commonly used for http. Knowing this, all we need to do is set a single rule for the firewall to drop all packets from port 80:
The packets won’t be able to get past the router and your server will be saved!
A pop-up containing the flag for Question 1 should appear.
Question 1
What is the flag?
Walkthrough:
See the write-up for the simulation, above.
Answer:
(Highlight below to find the answer):
THM{FIREWALLS_RULE}
Task 4 – VPN Basics
Virtual private networks allow users to form a network without being physically connected to each other.
Thus they allow devices from different networks to communicate privately, as though they were on their own network. They do this without the networks themselves being connected, thus offering privacy from users on the same physical network.
This offers numerous advantages, like being able to connect to a shared company network form around the world.
There are several common types of VPN’s:
PPP – Point to Point Protocol: Used for encryption and authentication of data. PPP is non-routable, meaning that it cannot be used across networks.
PPTP – Point to Point Tunneling Protocol: Allows PPP to be used across networks using tunneling.
IPSec – Internet Protocol Security: Provides encryption using the Internet Protocol (IP) framework.
Question 1
What VPN technology only encrypts & provides the authentication of data?
Walkthrough:
This technology is used by PPTP to allow a VPN to communicate across networks.
Answer:
(Highlight below to find the answer):
PPP
Question 2
What VPN technology uses the IP framework?
Walkthrough:
The IP framework is used to provide encryption to secure the VPN.
Answer:
(Highlight below to find the answer):
IPSec
Task 5 – LAN Networking Devices
Two important devices are covered during this task: routers and switches.
Routers are computers that allow networks to communicate with each other. They are Layer – 3 devices that also allow configuration of a firewall and port forwarding.
The word ‘routing’ refers to the act of finding the path between one point and another. For example when we visit a website, our data will travel from one router to another until it reaches it’s destination. Each router does it’s best to send the data to another router that will be able to get the packet closer to its’ final destination.
Switches are devices that connect multiple computers together. Switches can be either Layer 2 or Layer 3 devices.
Layer 2 switches can only connect computers on the same network together.
Layer 3 switches can perform some basic routing functions. ‘Layer 3’ is a bit of a misnomer as they are actually multilayer devices. They use Ethernet (Layer 2) to connect computers on the same network, and IP (Layer 3) to connect devices between networks. In general, however, they lack advanced routing functionality which is why routers are still common.
Question 1
What is the verb for the action that a router does?
Walkthrough:
What is the act of finding the way for the packet to travel from its’ source to its’ final destination?
Answer:
(Highlight below to find the answer):
Routing
Question 2
What are the two different layers of switches? Separate these by a comma I.e.: LayerX,LayerY
Walkthrough:
Remember, one layer uses Ethernet and the other uses IP.
Answer:
(Highlight below to find the answer):
Layer2,Layer3
Task 6 – Practical – Network Simulator
This Task contains an awesome network simulator that is a lot of fun to play with. To complete the task, all you have to do is send a TCP packet from computer 1 to computer 3.
When the TCP connection is closed, a pop-up will appear with the flag.
Question 1
What is the flag from the network simulator?
Walkthrough:
This flag will pop-up if you send a packet from computer1 to computer3 in the simulation.
Answer:
(Highlight below to find the answer):
THM{YOU’VE_GOT_DATA}
Conclusion
This room does a great job giving an overview of some huge topics in networking, and both simulations are a lot of fun.
I loved this room. In particular the network simulation in Task 6. A huge thanks to cmnatic, and adamtlangley for putting this room together!